This is the Stable version of the documentation. The latest version is experimental and under active development. You can use the version selector in the top-right menu to switch versions for this specific page, or click here to go to the latest version's homepage.
Harbor Configurations
Create Harbor Projects
Section titled “Create Harbor Projects”Create Harbor Project for Opstella
Section titled “Create Harbor Project for Opstella”You will be store Container Images for Opstella here.
-
Go to
${HARBOR_DOMAIN}and Login with Initial Admin Account. -
Go to
Projectsmenu >+ New Project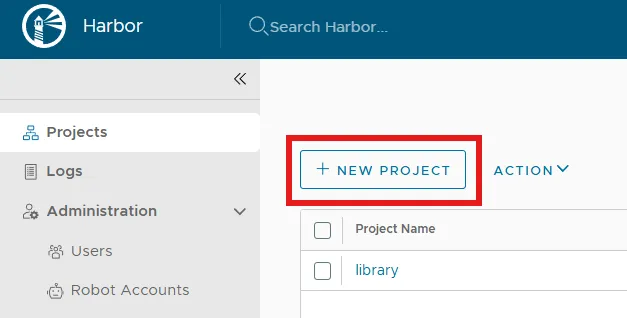
-
Create
opstella-platformProject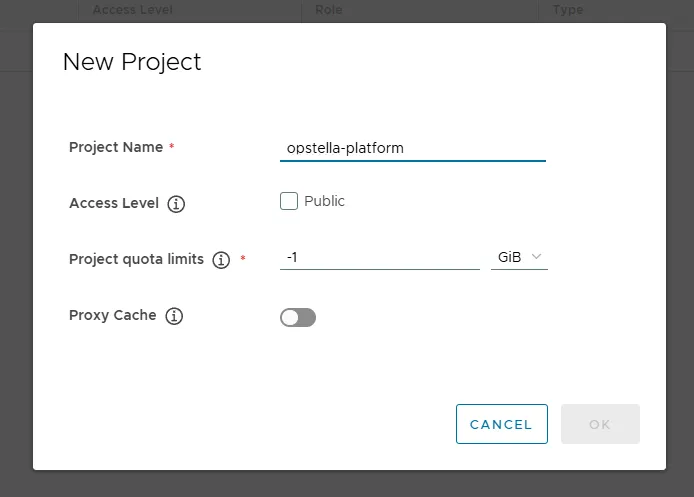
Create Harbor Projects for CI/CD Pipelines Container Image Mirrored/Proxy Caches Repository
Section titled “Create Harbor Projects for CI/CD Pipelines Container Image Mirrored/Proxy Caches Repository”To ease on CI/CD Pipelines Runtime which is container-based. (GitLab Runner with Kubernetes Executor + Opstella Standard GitLab CI Pipelines)
Directly pull from source may exhaust your network bandwidth/utilisation and the availability to access the registry.
Mirrored/Proxy Caches on Harbor Projects are created to act as a domestic storage for container images that frequently used by CI/CD Pipelines without extensively access the source registry.
-
Go to
Administrationmenu >Registries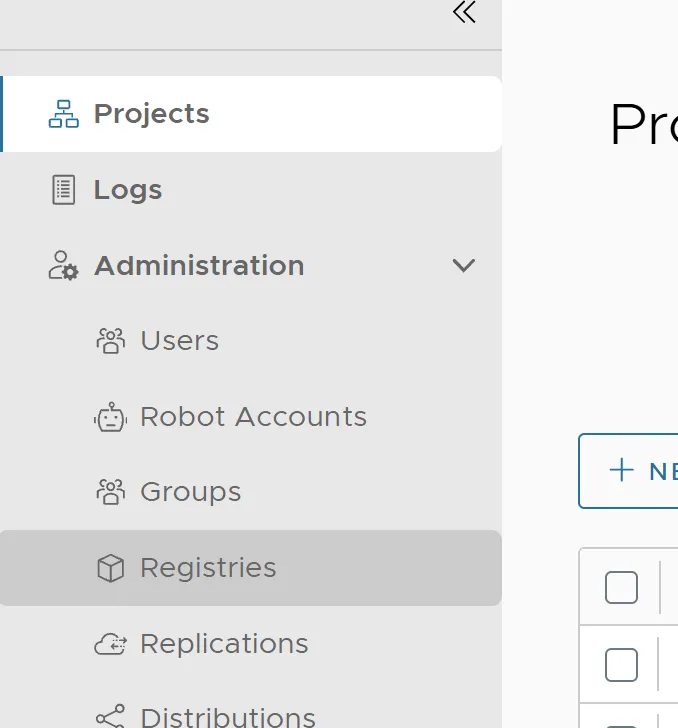
-
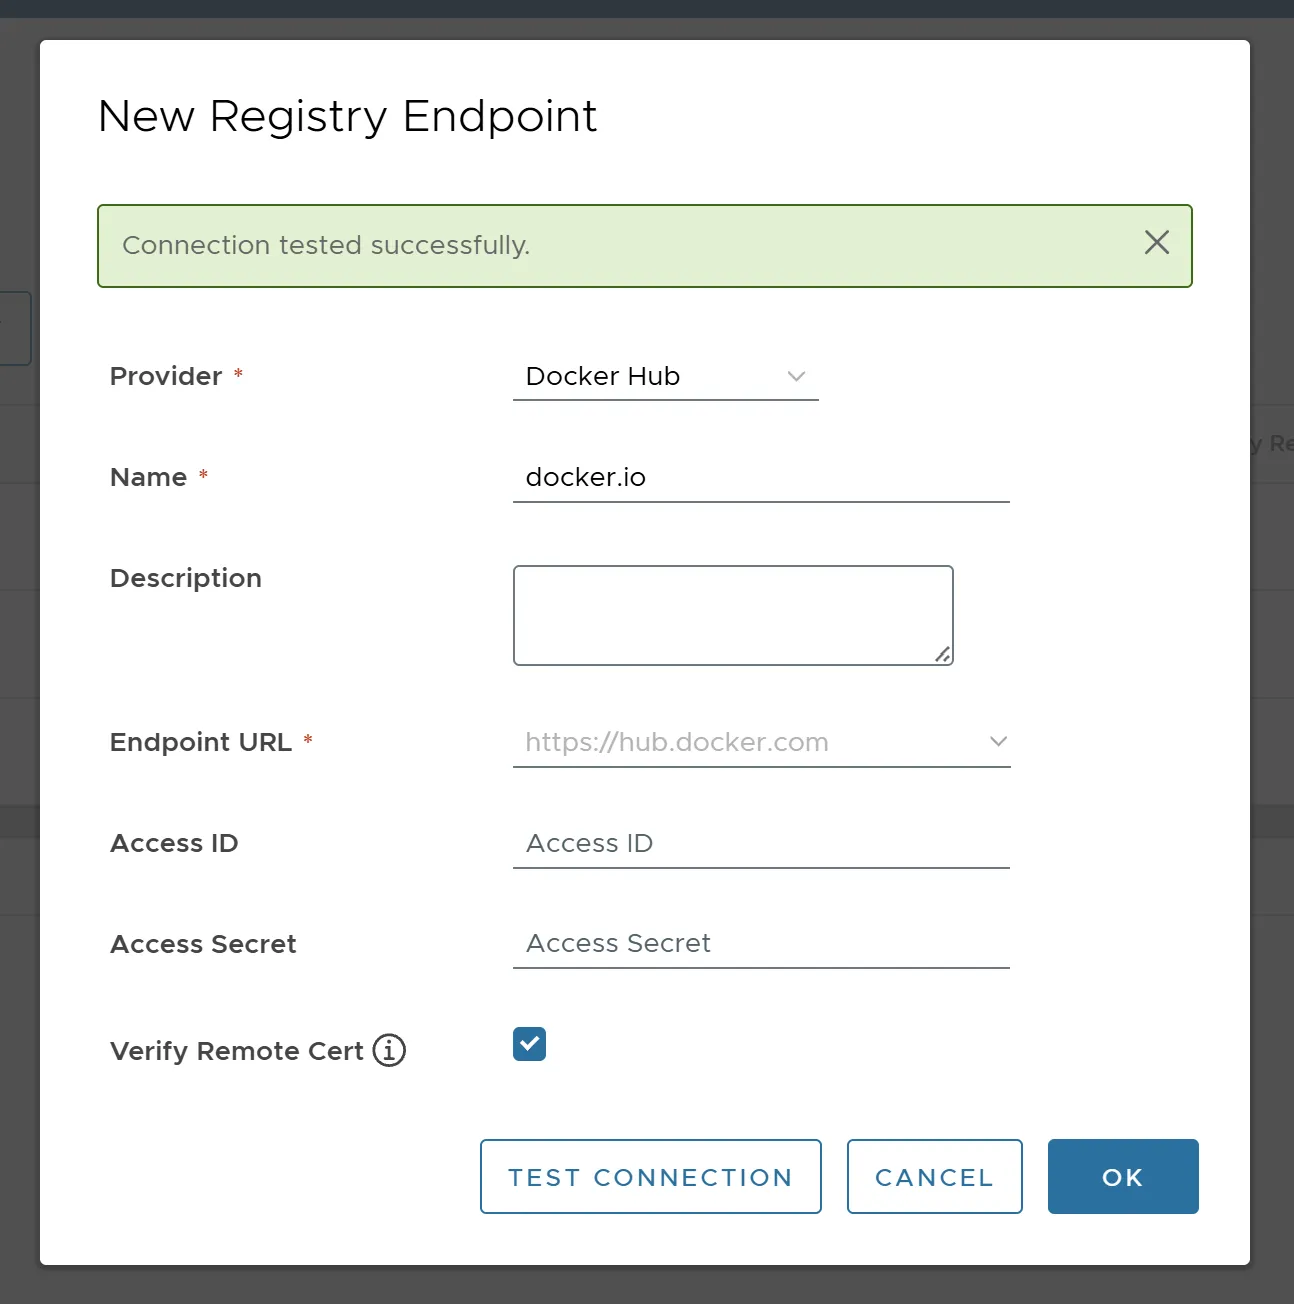
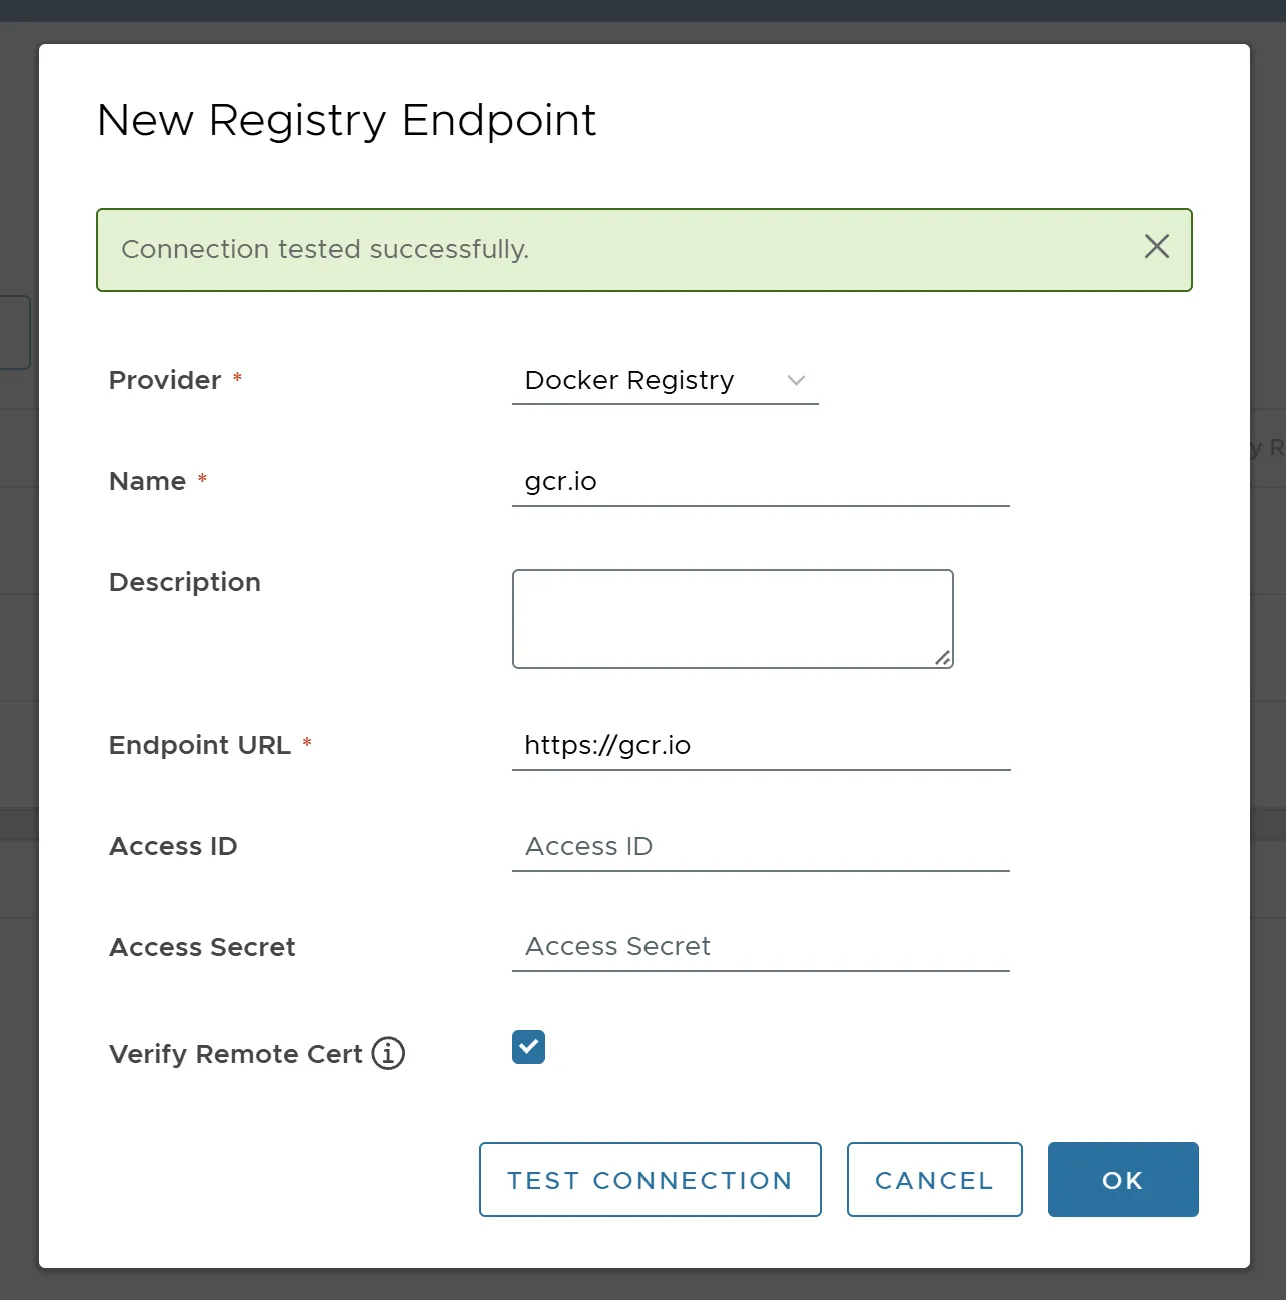
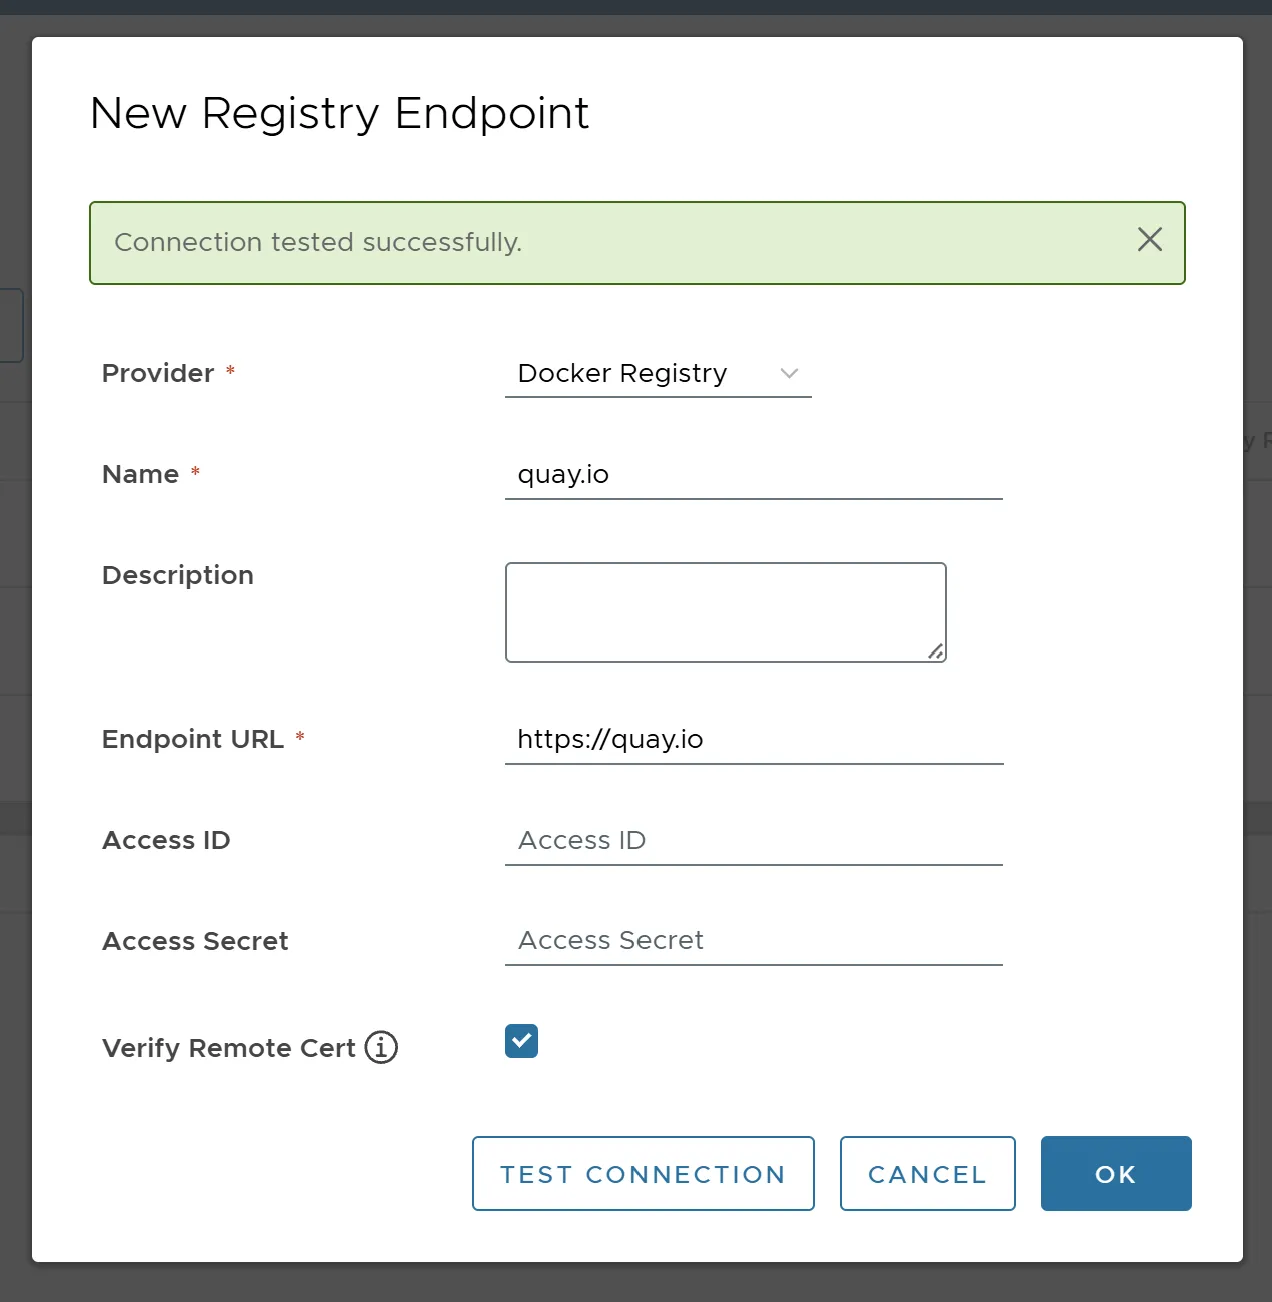
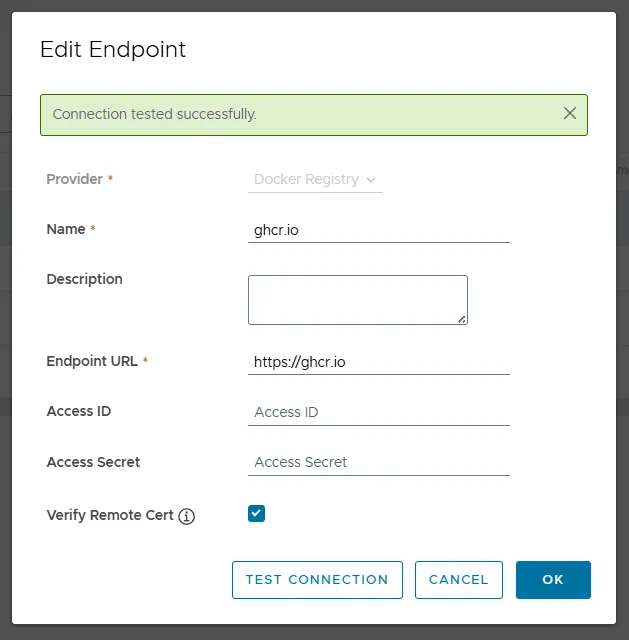
Click
+ New Endpointand populate these infomation.- Registry: Docker Hub
- Provider: Docker Hub
- Name:
docker.io
- Registry: gcr.io
- Provider: Docker Registry
- Name:
gcr.io - Endpoint URL:
https://gcr.io
- Registry: quay.io
- Provider: Docker Registry
- Name:
quay.io - Endpoint URL:
https://quay.io
- Registry: ghcr.io
- Provider: Docker Registry
- Name:
ghcr.io - Endpoint URL:
https://ghcr.io
- Registry: Docker Hub
-
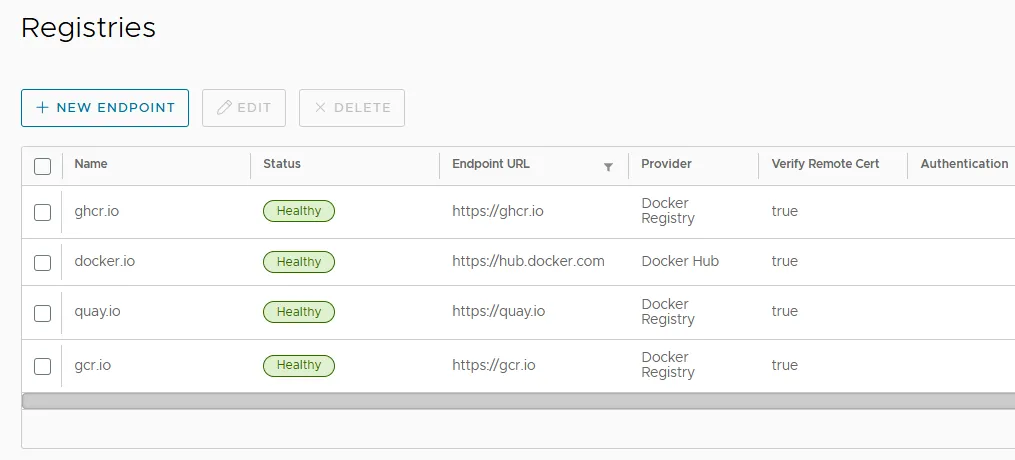
You should have registries recorded like this.
-
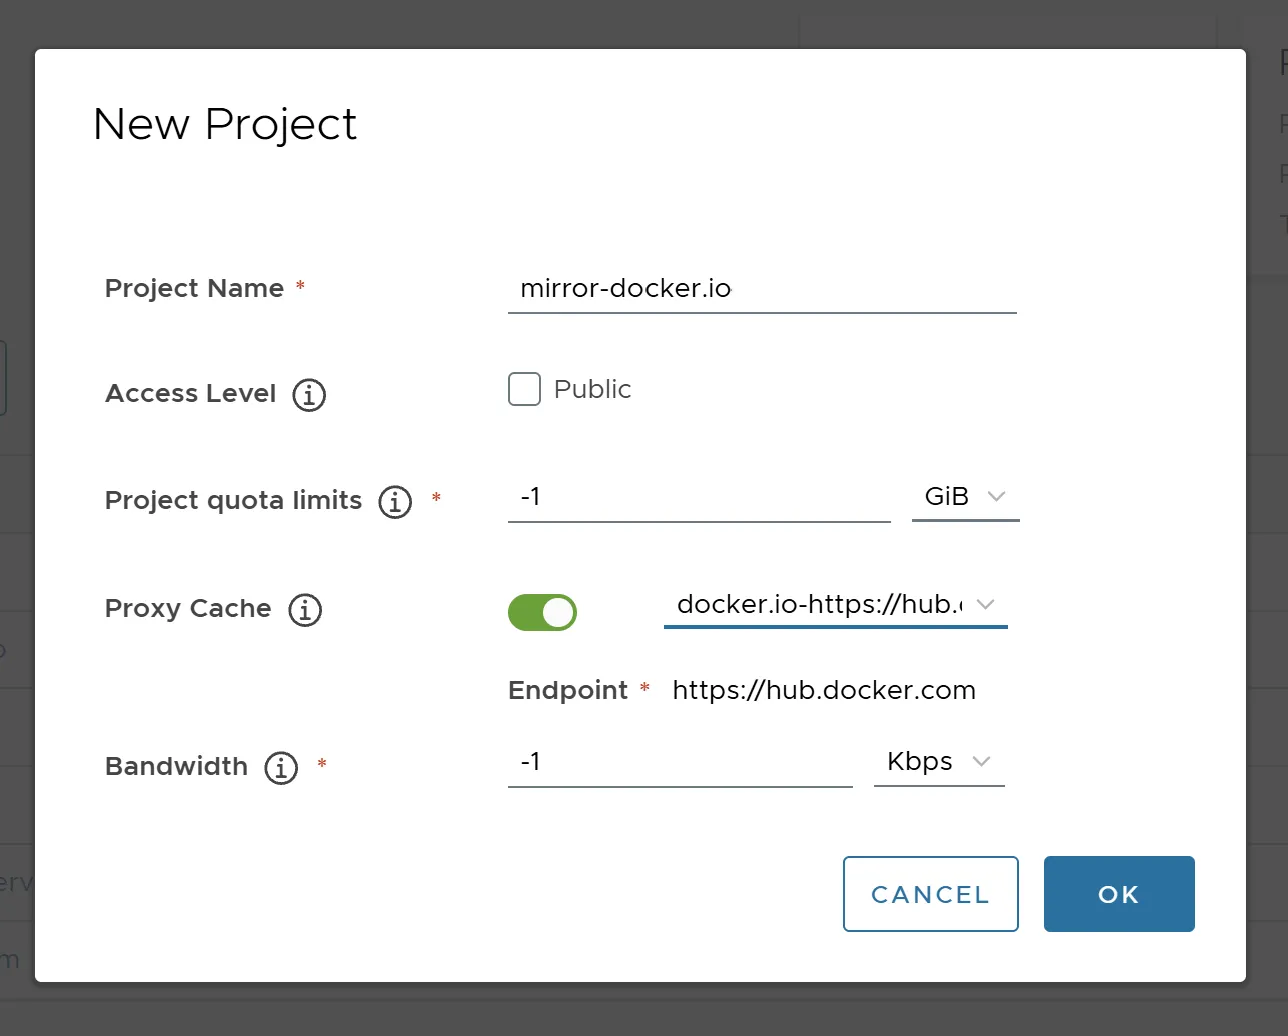
Go to
Projectsmenu >+ New Project -
Create Proxy Cache Projects
Create Each Project for each of registries that you previously create them.
-
Registry: Docker Hub
- Project Name:
mirror-docker.io - Tick Proxy Cache, choose
docker.io-https://hub.docker.com
- Project Name:
-
Registry: gcr.io
- Project Name:
mirror-gcr.io - Tick Proxy Cache, choose
gcr.io-https://gcr.io
- Project Name:
-
Registry: quay.io
- Project Name:
mirror-quay.io - Tick Proxy Cache, choose
quay.io-https://quay.io
- Project Name:
-
Registry: ghcr.io
- Project Name:
mirror-ghcr.io - Tick Proxy Cache, choose
ghcr.io-https://ghcr.io
- Project Name:
-
-
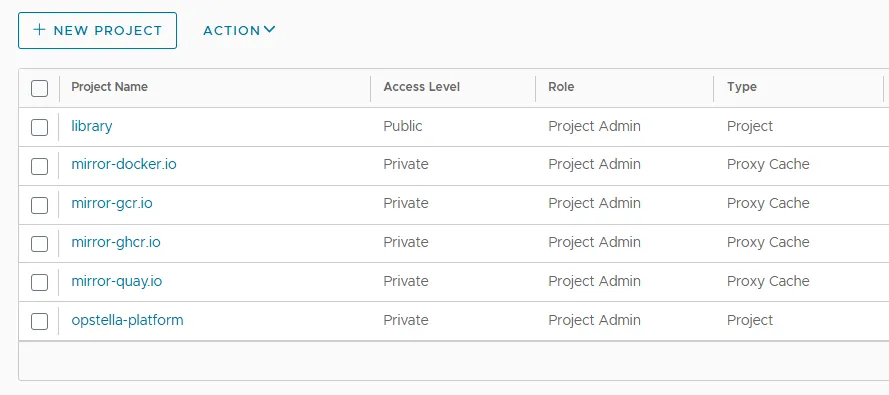
Proxy Cache Projects should look like this.
Create Robot Accounts
Section titled “Create Robot Accounts”Create Robot Account for Opstella Deployment
Section titled “Create Robot Account for Opstella Deployment”This will be a credentials used to push/pull while installing Opstella Container Images.
-
Go to
Administrationmenu >Robot Accounts -
Create New Robot Account
+ New Robot Account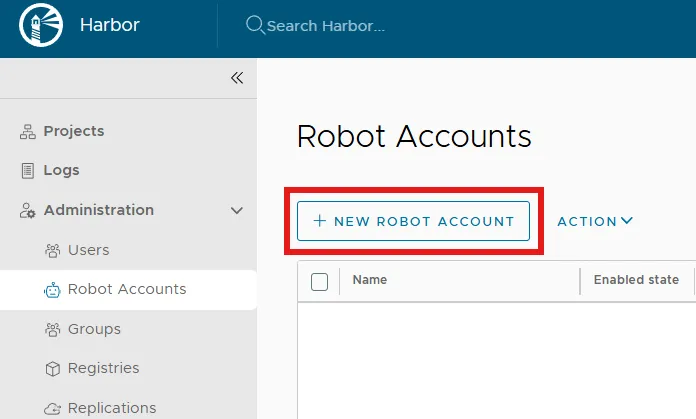
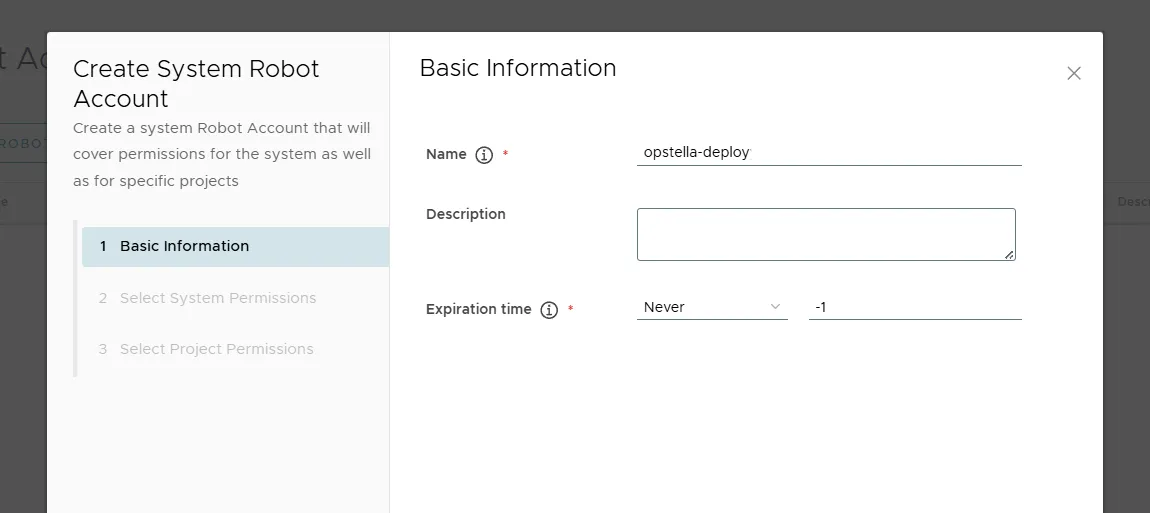
Basic Information
- Name:
opstella-deploy - Description:
Deploy Credentials for Opstella - Expiration time:
Never
- Name:
-
Click
Nextto skip Assigning System Permissions -
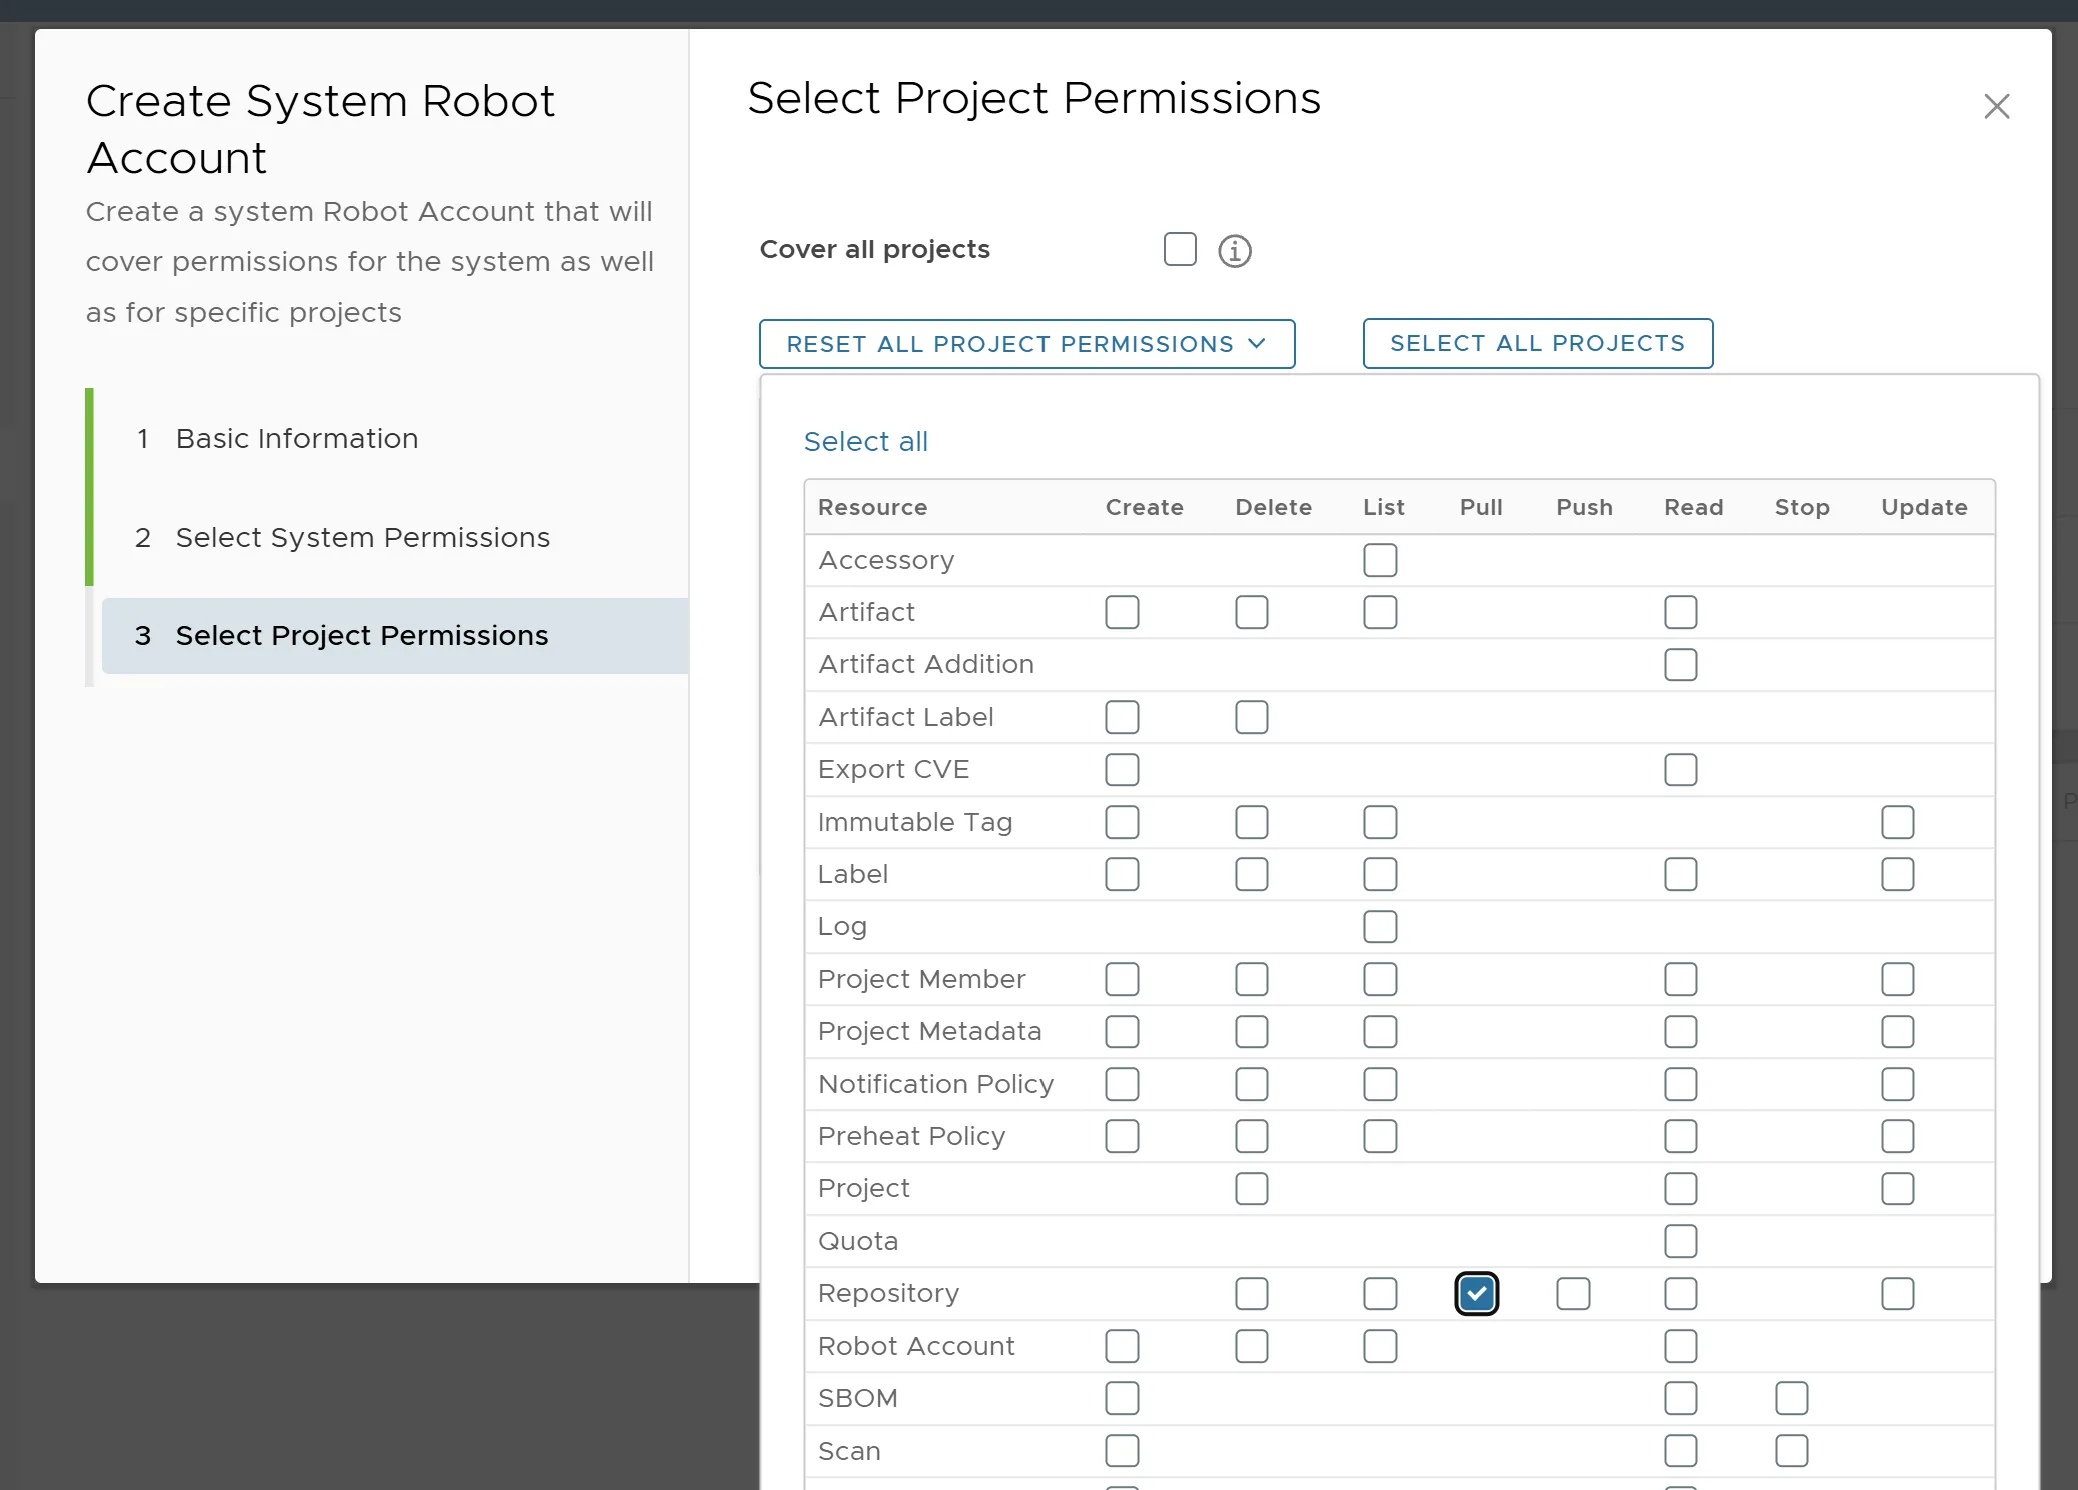
Assign
opstella-platformProject Permissions- Tick on
opstella-platformProject
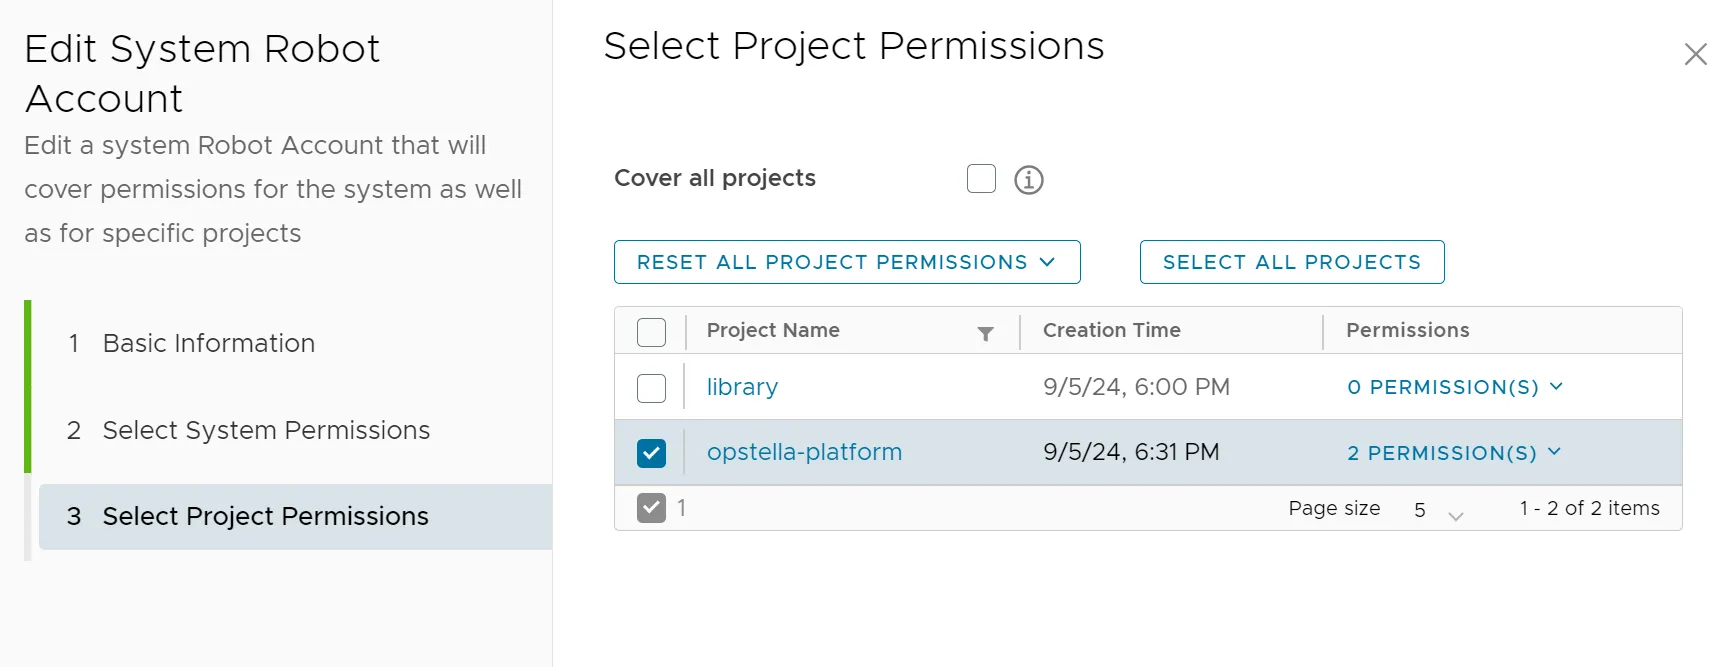
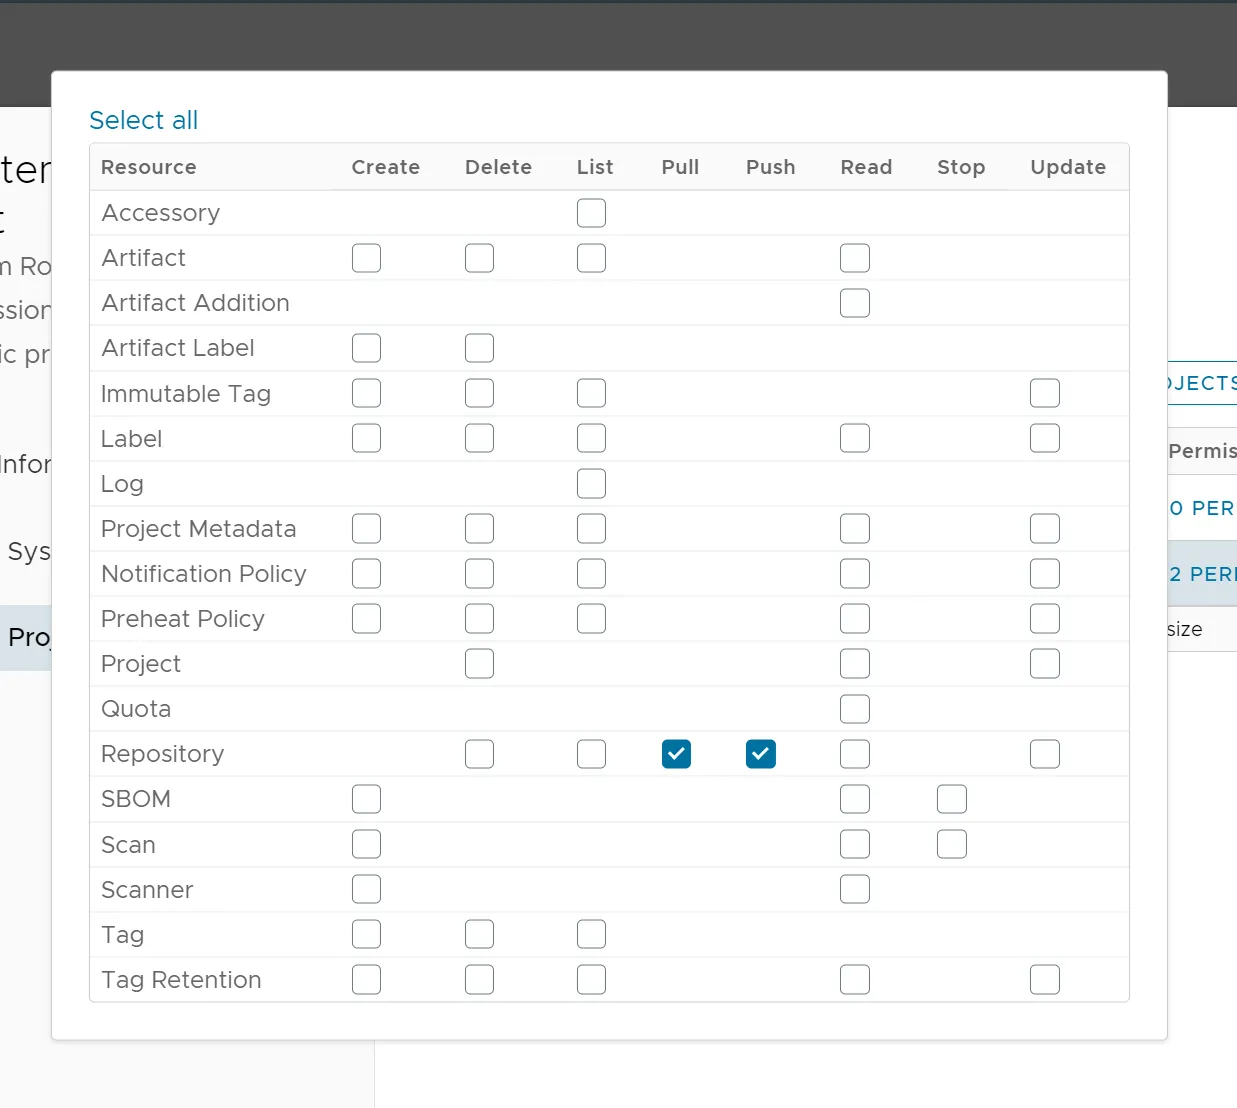
- Assign Pull, Push Repository Permissions
- Tick on
-
Keep the token SAFE as you will be using it while install
Opstellain the later step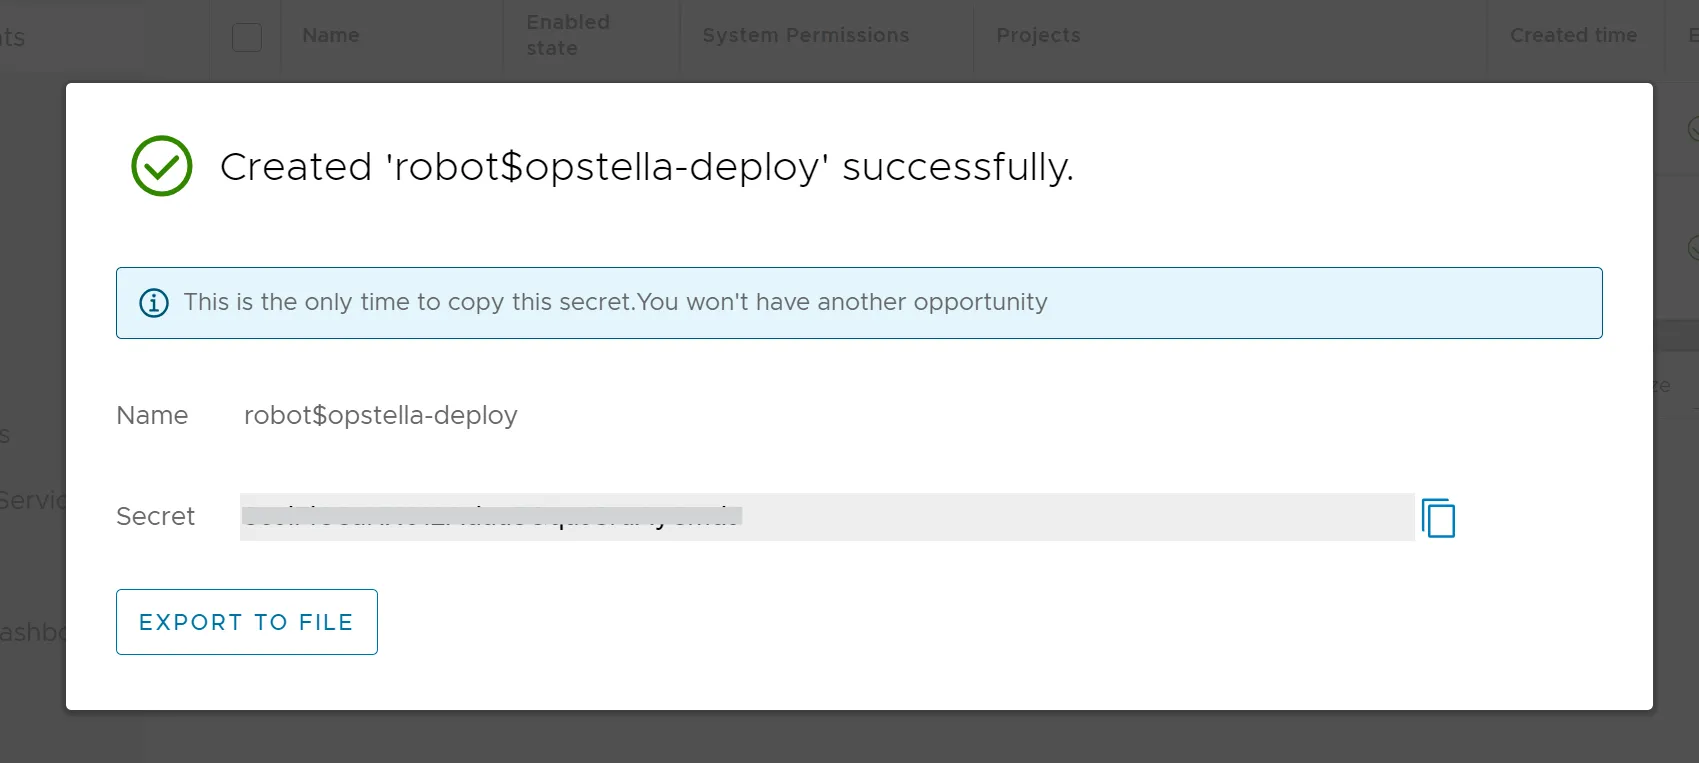
Create Robot Account for Opstella-managed GitLab Runner Access
Section titled “Create Robot Account for Opstella-managed GitLab Runner Access”This will be a credentials used to pull Artifacts for Opstella-managed GitLab Runners.
-
Go to
Administrationmenu >Robot Accounts -
Create New Robot Account
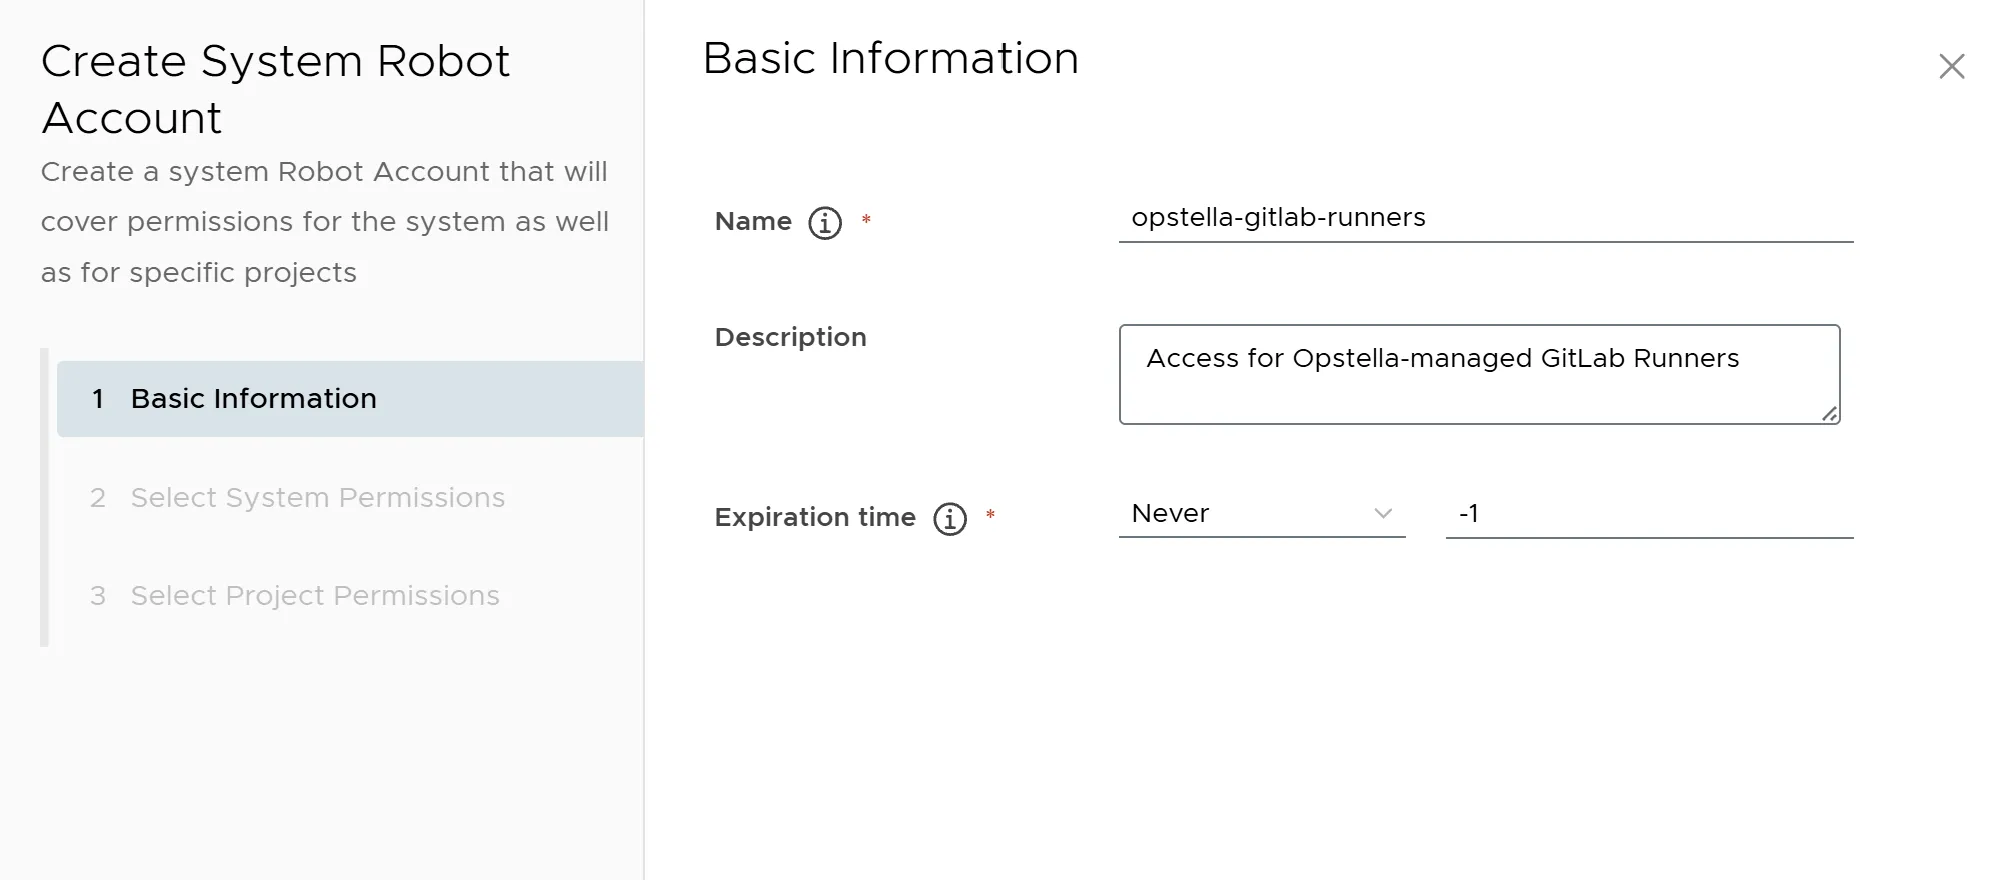
+ New Robot AccountBasic Information
- Name:
opstella-gitlab-runners - Description:
Access for Opstella-managed GitLab Runners - Expiration time:
Never
- Name:
-
Click
Nextto skip Assigning System Permissions -
Assign Projects Permissions
- Tick on Projects
- [x]
library - [x]
mirror-docker.io - [x]
mirror-gcr.io - [x]
mirror-quay.io - [x]
mirror-ghcr.io
- [x]
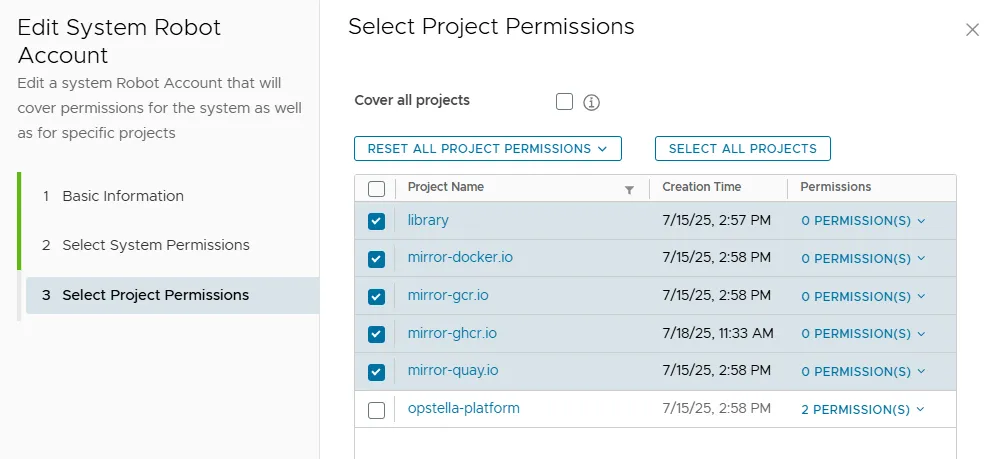
- Assign Pull Repository Permission with
Reset All Project Permissionsand ClickFinish
- Tick on Projects
-
Keep the token SAFE as you will be using it while setup
Opstella-managed GitLab Runners Deployment Templatein the later step
Push Opstella Container Images to Private Registry (Air-gapped Installation)
Section titled “Push Opstella Container Images to Private Registry (Air-gapped Installation)”Prerequisites
Section titled “Prerequisites”Before proceeding, ensure you have your Google Service Account Key (JSON) on the Bastion Host.
Define the required environment variables:
# 1. Source Registry (Google Artifact Registry)export SOURCE_REGISTRY="asia-southeast1-docker.pkg.dev/opstella/platform"
# 2. Destination Registry (Your Local Harbor)export HARBOR_DOMAIN="harbor.your-domain.com" # Replace with your actual domainexport DEST_REGISTRY="${HARBOR_DOMAIN}/opstella-platform"
# 3. Opstella Version to Installexport VERSION="v1.0.0" # Replace with the specific version tag-
Login to Registries
1.1 Login to Google Artifact Registry (Source) Use the JSON key file you downloaded earlier.
Terminal window # Replace path/to/key.json with your actual file pathcat path/to/key.json | docker login -u _json_key --password-stdin https://asia-southeast1-docker.pkg.dev1.2 Login to Local Harbor Registry (Destination) Use your previously created Robot Account.
Terminal window ## For security reasons turn off bash history momentarilyset +o historyexport REGISTRY_USERNAME='robot$opstella-deploy'export REGISTRY_PASSWORD="CHANGEME"docker login $HARBOR_DOMAIN \--username "$REGISTRY_USERNAME" \--password "$REGISTRY_PASSWORD"set -o history -
Pull, Tag, and Push Images
We will pull images from the Google Cloud source, re-tag them for your local Harbor, and push them.
2.1 Core Services (UI, Backend, Utilities)
Terminal window # List of core servicesCORE_SERVICES=("ui" "core" "clear-session")for SERVICE in "${CORE_SERVICES[@]}"; doecho "Processing ${SERVICE}..."# Pulldocker pull "${SOURCE_REGISTRY}/${SERVICE}:${VERSION}"# Tagdocker tag "${SOURCE_REGISTRY}/${SERVICE}:${VERSION}" "${DEST_REGISTRY}/${SERVICE}:${VERSION}"# Pushdocker push "${DEST_REGISTRY}/${SERVICE}:${VERSION}"done2.2 Opstella Workers
Push the specific worker images required for your installation.
#!/bin/bash# Define enabled instrumentsexport OPSTELLA_ENABLED_INSTRUMENTS=(keycloak kubernetes argocd-nonprod argocd-prod defectdojo gitlab headlamp-nonprod headlamp-prod harbor sonarqube vault grafana loki tempo)for KEY in "${OPSTELLA_ENABLED_INSTRUMENTS[@]}"do# Normalize image names (remove suffixes like -prod/-nonprod)if echo "$KEY" | grep -q "^argocd"; thenexport IMAGE_NAME="argocd"elif echo "$KEY" | grep -q "^headlamp"; thenexport IMAGE_NAME="headlamp"elif echo "$KEY" | grep -q "^kubernetes"; thenexport IMAGE_NAME="kubernetes"elseexport IMAGE_NAME="$KEY"fiSOURCE_IMAGE="${SOURCE_REGISTRY}/worker-${IMAGE_NAME}:${VERSION}"DEST_IMAGE="${DEST_REGISTRY}/worker-${IMAGE_NAME}:${VERSION}"echo "Processing Worker: ${IMAGE_NAME}..."# Pulldocker pull "$SOURCE_IMAGE"# Tagdocker tag "$SOURCE_IMAGE" "$DEST_IMAGE"# Pushdocker push "$DEST_IMAGE"done
Finished?
Use the below navigation to proceed