

This is the Stable version of the documentation. The latest version is experimental and under active development. You can use the version selector in the top-right menu to switch versions for this specific page, or click here to go to the latest version's homepage.
Apply Opstella Core Configuration
เนื้อหานี้ยังไม่มีในภาษาของคุณ
Apply to Opstella Core with Management Admin Panel
Section titled “Apply to Opstella Core with Management Admin Panel”-
Go to Opstella Management Admin Panel
opstella-backend.${BASE_DOMAIN}/admin -
Login with Opstella Core Credentials
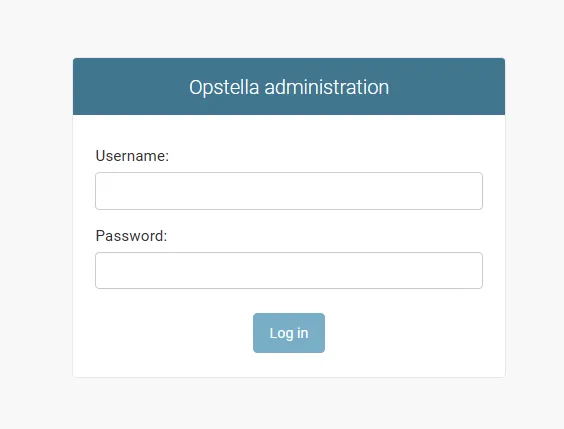
-
Go to
Workers>Configs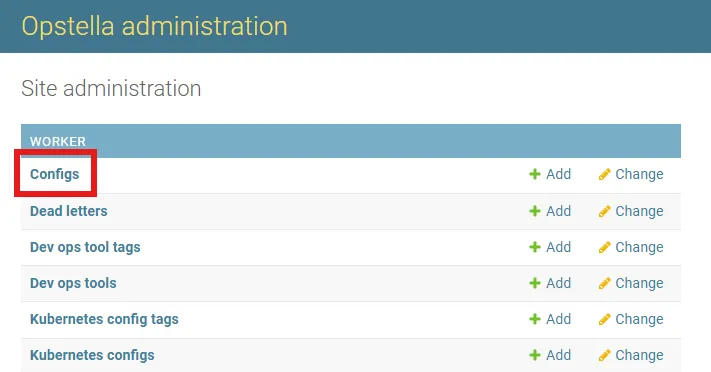
-
Add Config +(Top Right) and paste contents ofopstella-backend-devopstool.yamlfordevopstoolkind and clickSavein the buttom page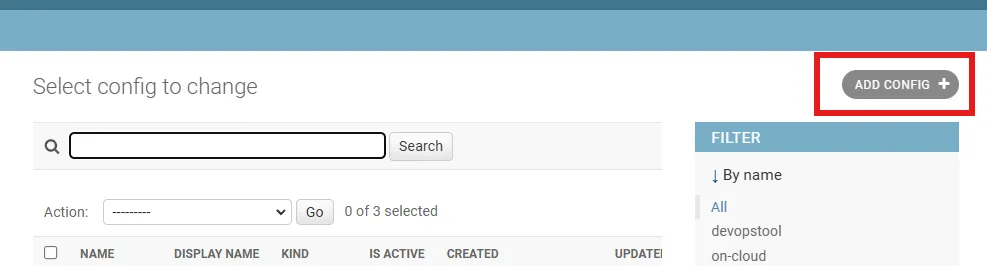
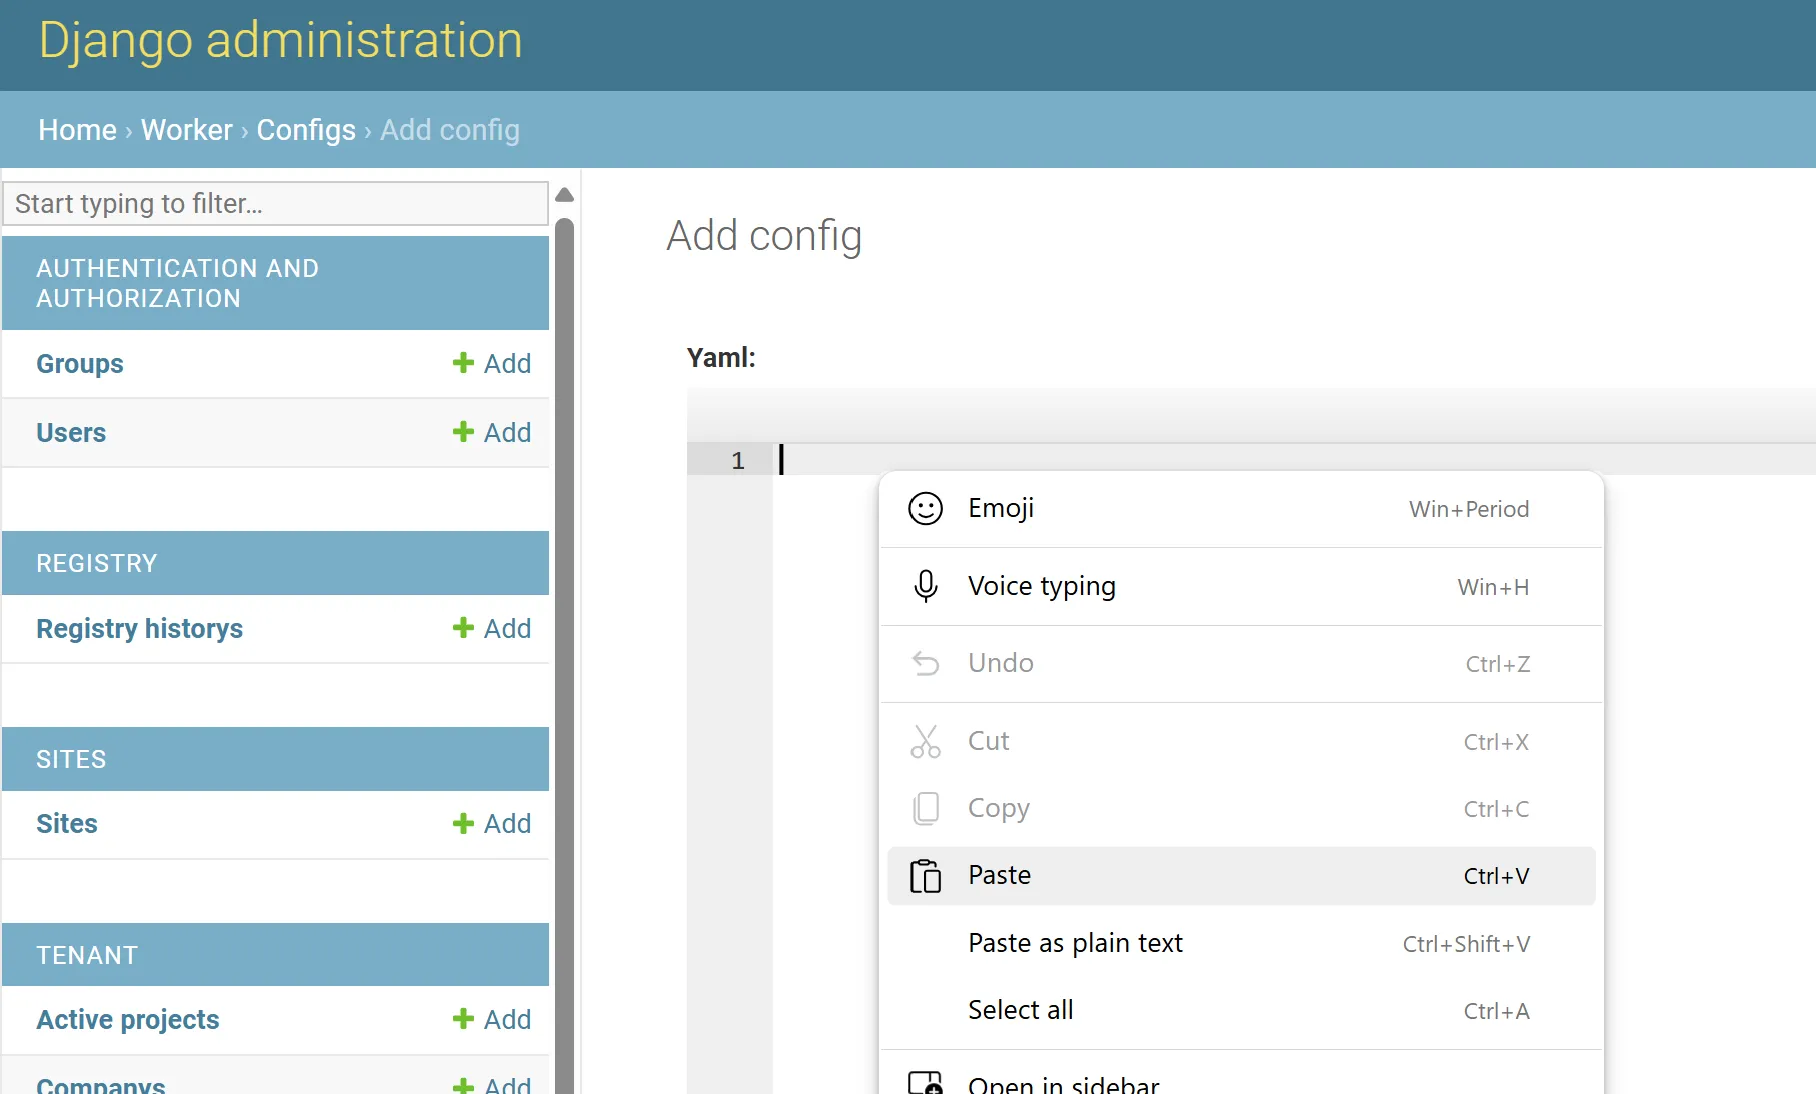
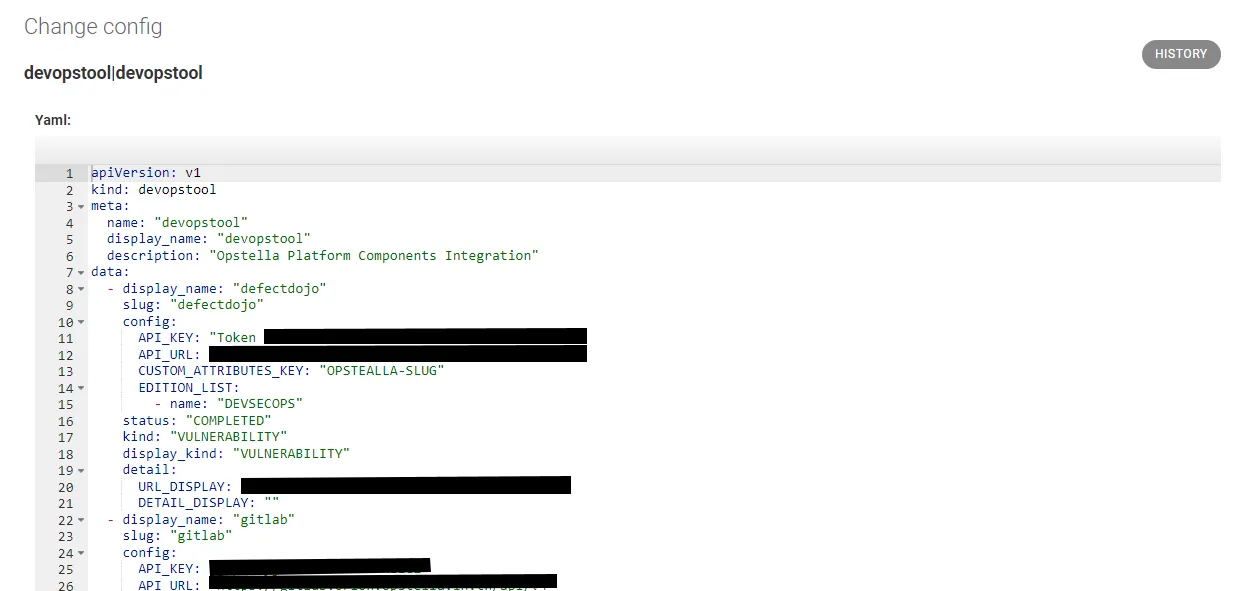
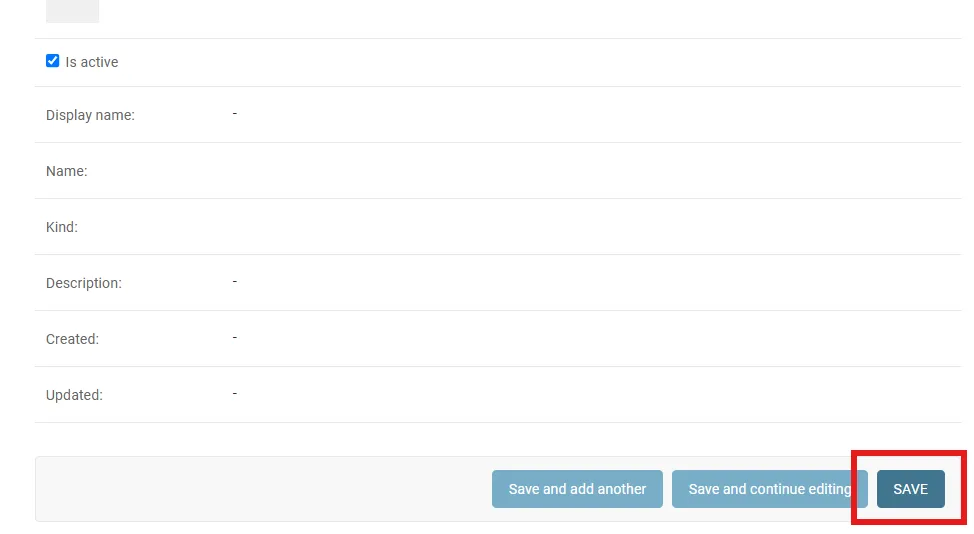
-
Add Config +(Top Right) and paste contents ofopstella-backend-tag-on-premise.yamlfortagkind and clickSavein the buttom page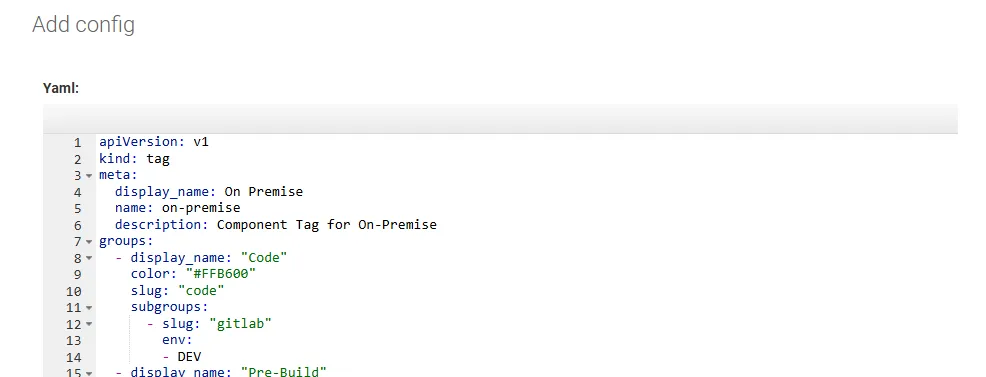
Register Kubernetes Clusters Records to New Table
Section titled “Register Kubernetes Clusters Records to New Table”-
Connect to
🟢 ManagementKubernetes Cluster ; i.e w/ Kubeconfig FileEnsure you have defined and loaded your Global Shell Variables as described in Shell Variables.
Terminal window source $HOME/opstella-installation/shell-values/kubernetes/management_cluster.vars.shTerminal window export KUBECONFIG="$HOME/opstella-installation/kubeconfigs/management_cluster.yaml" -
Use
kubectl execcommand to get intoopstella-core-XXXXXXXXX-YYYYYcontainer.Firstly, Get the name of Opstella Core (Back-end) Pod.
Terminal window kubectl get pods --namespace opstella-systemChange
opstella-core-XXXXXXXXX-YYYYYto be the one you get from getting pods list.Terminal window kubectl exec -i -t --namespace opstella-system pod/opstella-core-XXXXXXXXX-YYYYY -- sh -
Run Command
Terminal window python manage.py migrate_opstella_v5 -
Go back to Opstella Management Admin Panel
opstella-backend.${BASE_DOMAIN}/admin -
Go to
Workers>Kubernetes clusters, you will see a list of your Kubernetes Clusters configured to managed with Opstella.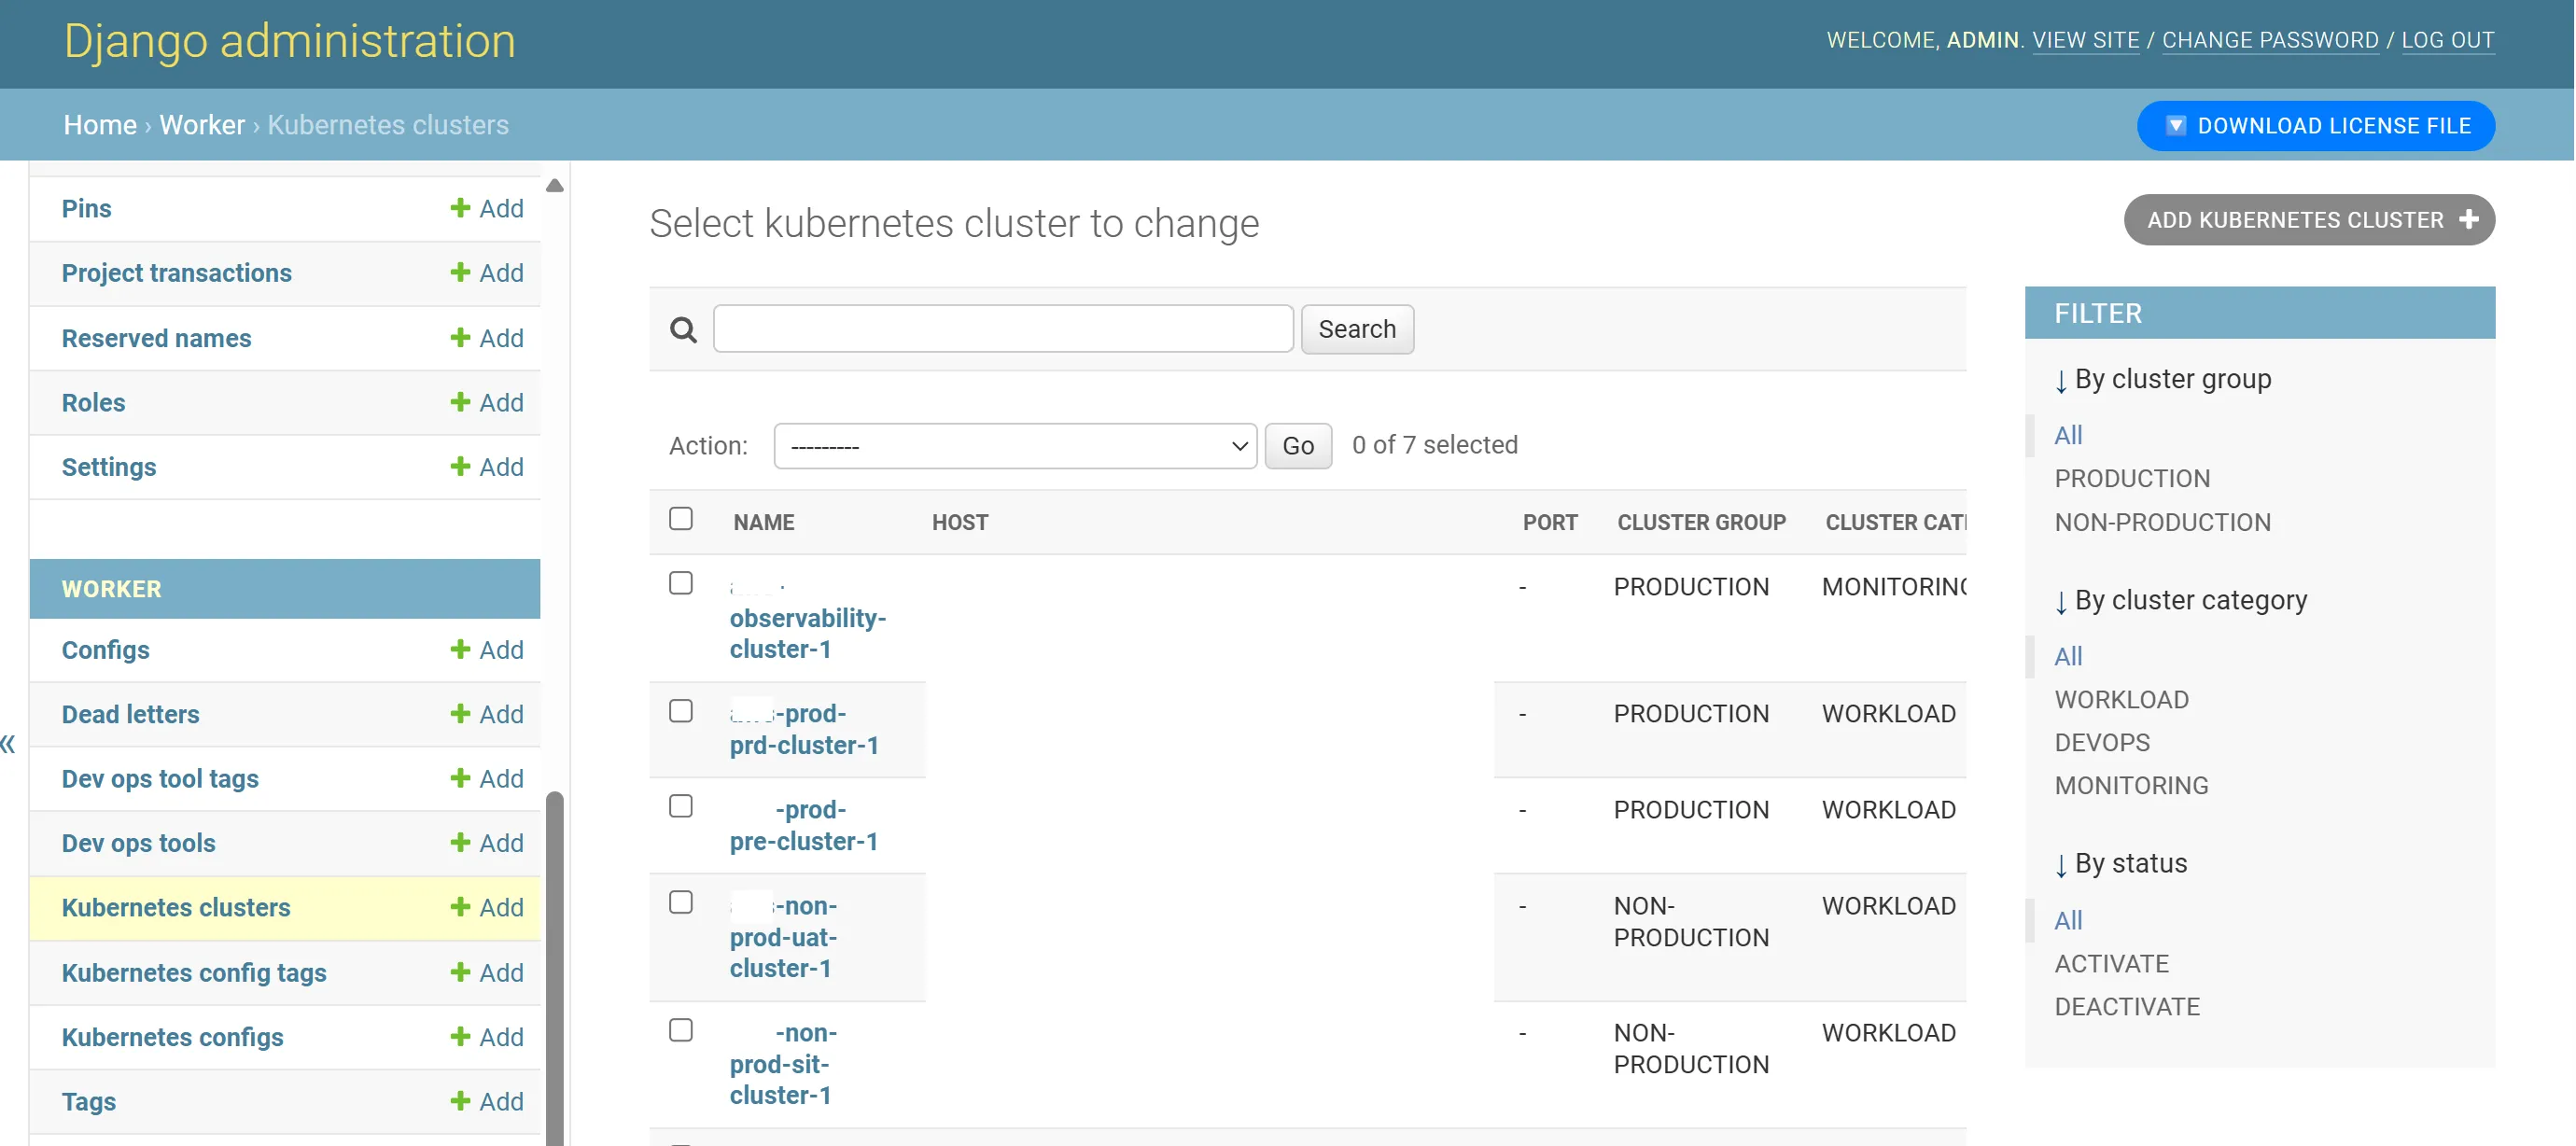
-
Click EACH of the record and assign Cluster group and Cluster category accordingly.
- 🟦 Non-Production DEV Workload Kubernetes Cluster
- Cluster group: NON-PRODUCTION
- Cluster category: WORKLOAD
- 🟥 Production PRD Workload Kubernetes Cluster
- Cluster group: PRODUCTION
- Cluster category: WORKLOAD
- 🟢 Management Kubernetes Cluster
- Cluster group: NON-PRODUCTION
- Cluster category: DEVOPS
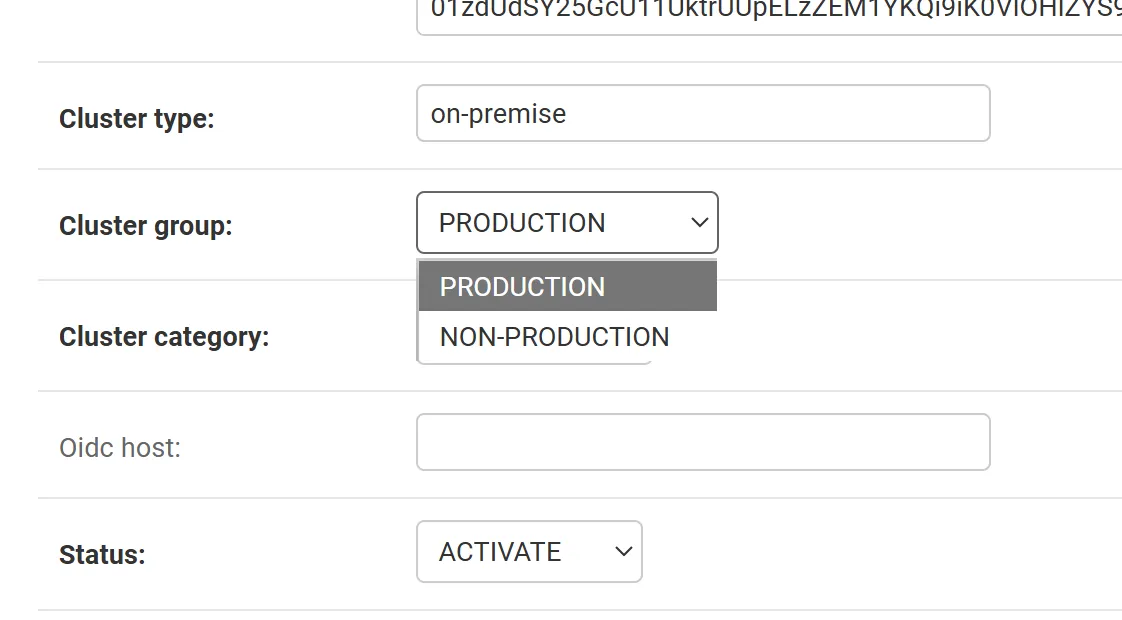
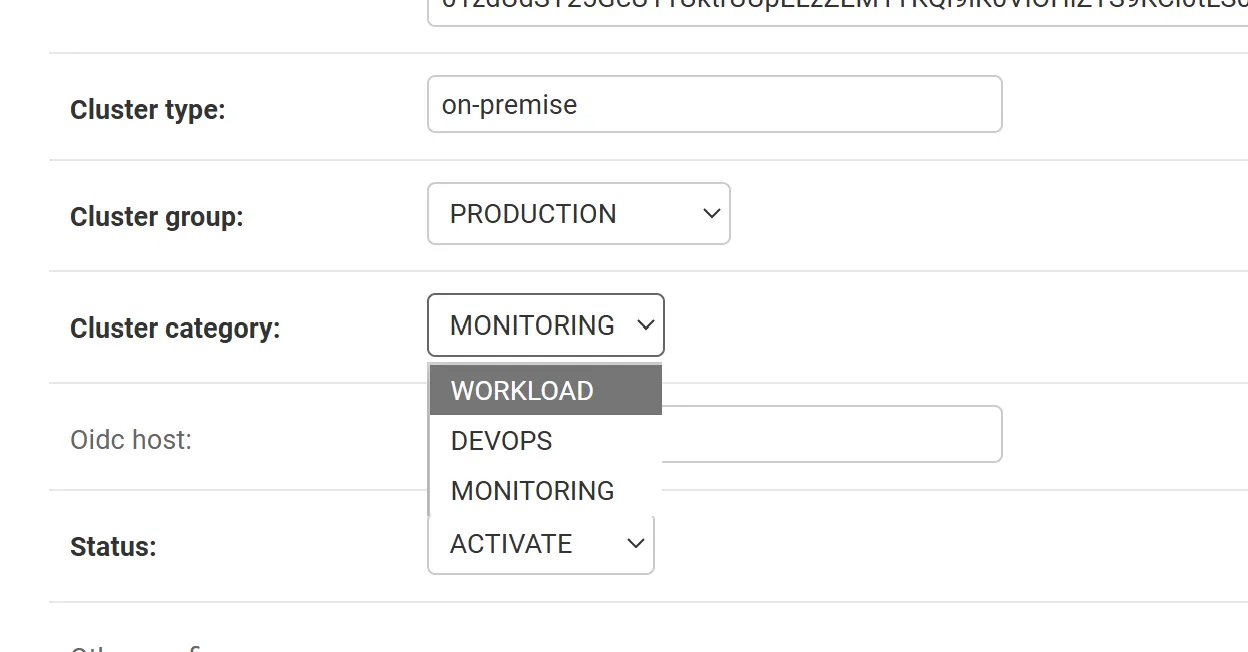
Click
Saveon EACH of them. - 🟦 Non-Production DEV Workload Kubernetes Cluster
Add Keycloak to Tag Resource Manually
Section titled “Add Keycloak to Tag Resource Manually”-
Go to
Workers>Dev ops tool tags>Add dev ops tool tag +(Top Right)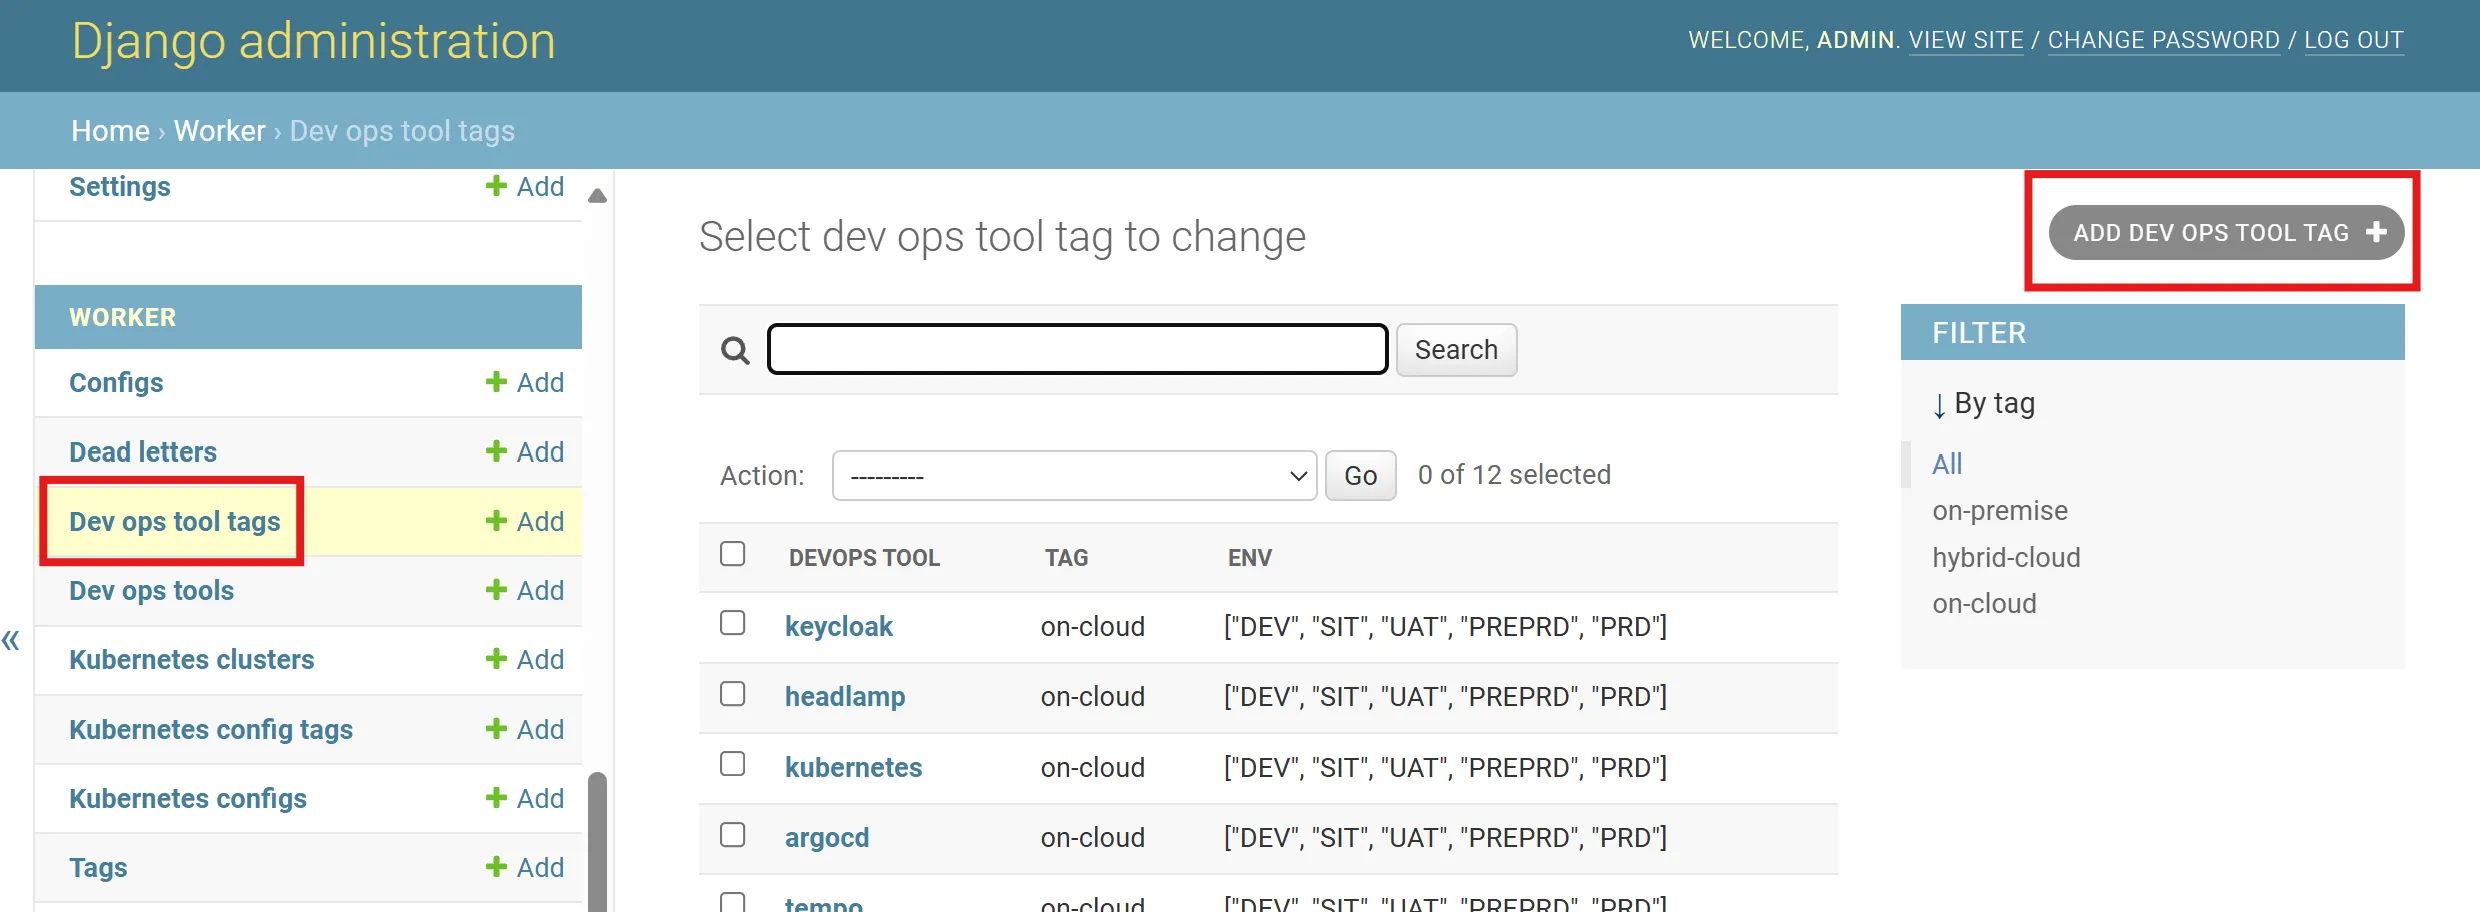
-
Select/Specify the following
-
Devops tool:
keycloak -
Tag:
on-premise -
Env:
["DEV", "SIT", "UAT", "PREPRD", "PRD"](In case where you have 5 Environments in Opstella)- This text will need to be change ONLY IF you will have different number of Environments managed by Opstella
- For instance, you only have 3 Environments managed by Opstella (
DEV,PRE,PRD)- This field will be
["DEV", "PREPRD", "PRD"]
- This field will be
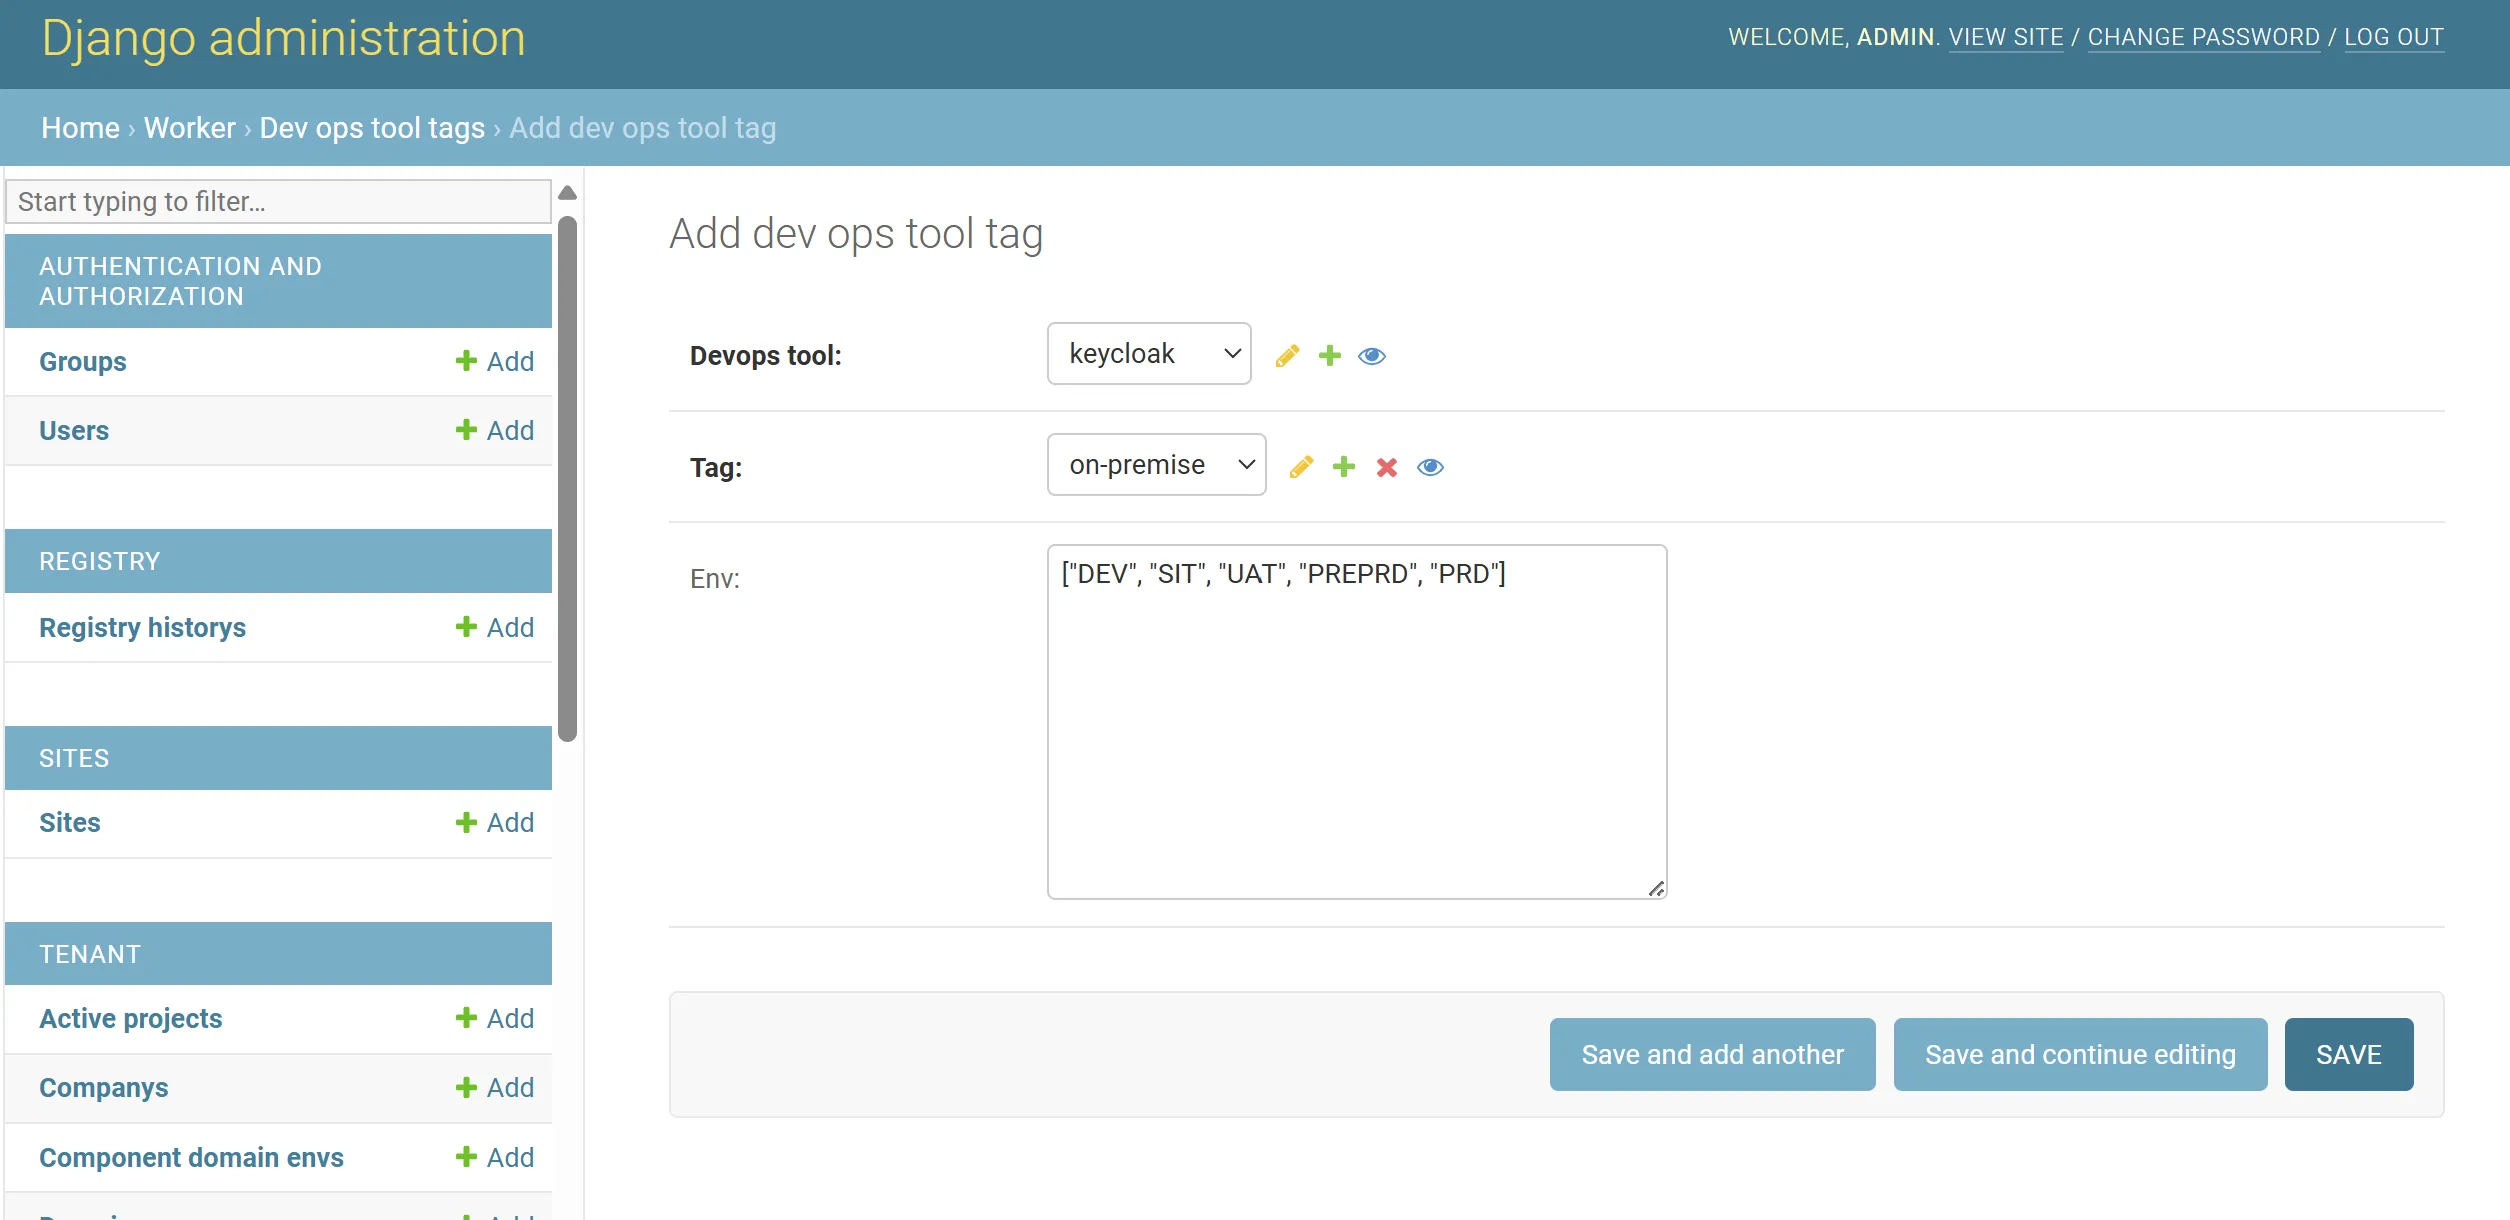
-
-
Click
Saveon the bottom right
Opstella Company Synchronisation
Section titled “Opstella Company Synchronisation”-
Go to
Tenant>Companys; You should see a record of your organization name, havingPROCESSINGStatus.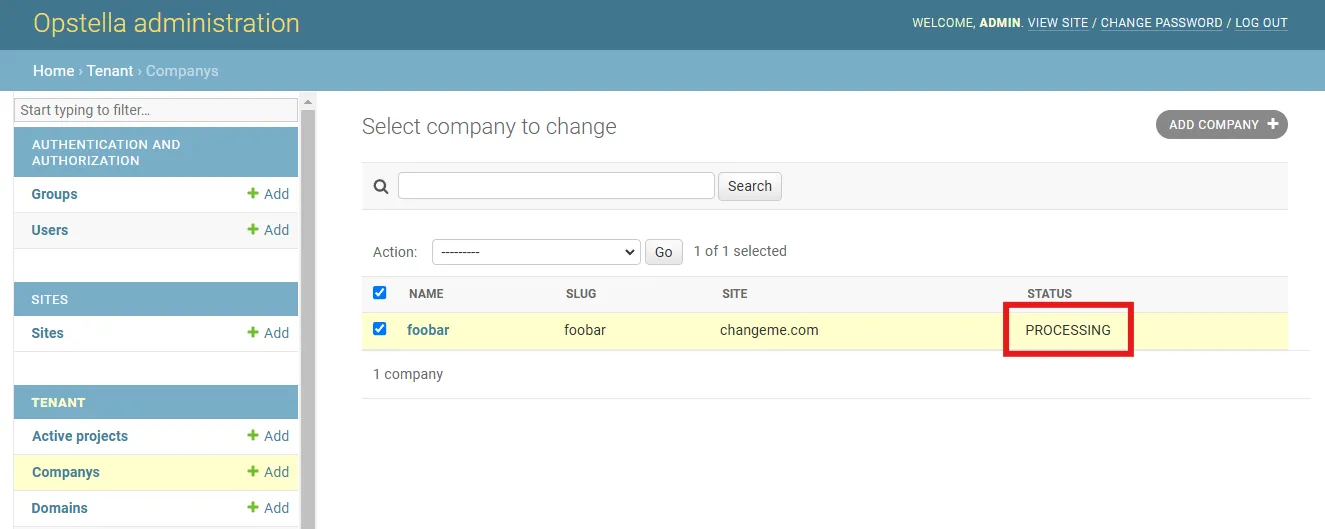
-
Tick ✅ on the record of your organization name.
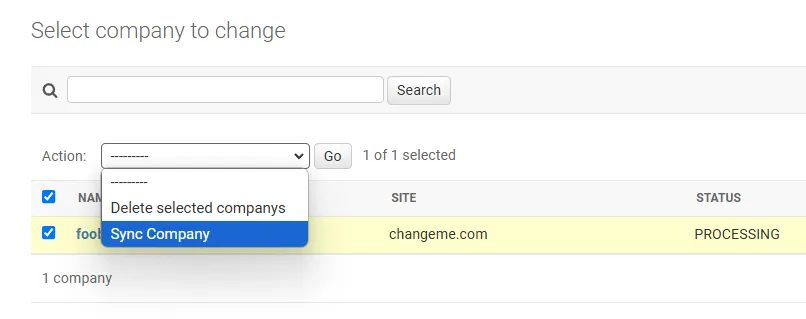
-
The record of your organization name should soon have the Status of
ACTIVE; Try refresh the page if it is not changing.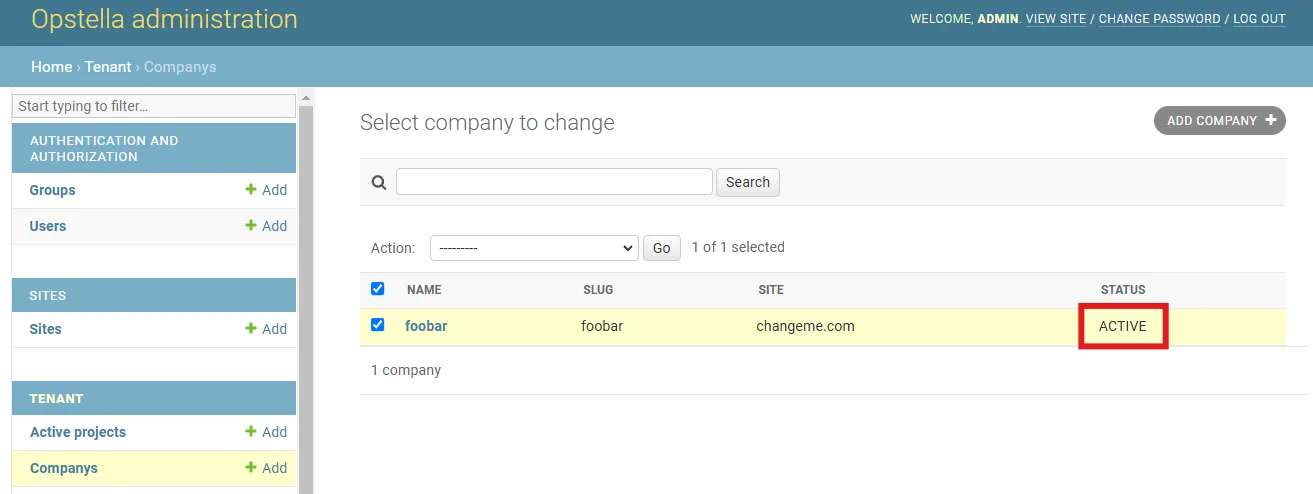
After applying the Config: publish the credentials to the state store
Section titled “After applying the Config: publish the credentials to the state store”Applying the Config writes the DevOpsTool records, but the workers read each tool’s credentials
from the Dapr state store, which is only written when a record is saved. Until then the state
store has no core-credential-* keys and the first task each worker picks up fails.
Re-save every record once:
kubectl exec -i -t --namespace opstella-system deploy/opstella-core -- \ python manage.py shell -c "from worker.models import DevOpsToolfor d in DevOpsTool.objects.all().order_by('id'): d.save()print('re-saved', DevOpsTool.objects.count())"Troubleshooting: the Company stays PROCESSING
Section titled “Troubleshooting: the Company stays PROCESSING”Synchronisation is all-or-nothing. Task.manager.check_task_all_completed compares the number of
completed tasks against DevOpsTool.objects.filter(status="COMPLETED").count(), and the batch is
built from that same filter — so one tool the workers cannot reach keeps the Company in
PROCESSING forever. There is no timeout and the Admin Panel shows no error.
Find which tool did not finish:
kubectl exec -i -t --namespace opstella-system deploy/opstella-core -- \ python manage.py shell -c "from worker.models import Task, DevOpsToolprint('tools :', DevOpsTool.objects.filter(status='COMPLETED').count())for t in Task.objects.order_by('-id')[:20]: print(t.id, t.method, t.status, t.request_slug)"Then either fix the connectivity to that tool and synchronise again, or take it out of the batch
temporarily by setting its status to WAITING:
kubectl exec -i -t --namespace opstella-system deploy/opstella-core -- \ python manage.py shell -c "from worker.models import DevOpsToold = DevOpsTool.objects.get(name='CHANGEME'); d.status = 'WAITING'; d.save()"When the Opstella UI is not reachable yet
Section titled “When the Opstella UI is not reachable yet”Every step on this page is written against the Admin Panel. If the Ingress, DNS or certificate for
opstella-backend.${BASE_DOMAIN} is not in place yet, the same work can be done through
manage.py shell as shown above.
A kubectl port-forward to the Admin Panel is not an equivalent: Django compares the request
Origin against CSRF_TRUSTED_ORIGINS, which is derived from BASE_DOMAIN, so logging in over
http://127.0.0.1:<port> fails CSRF validation.
Finished?
Use the below navigation to proceed